Twitter is a wonderful and information rich beast. I wanted to combine some of the powers of visualization, Three.js and its VR capabilities with Socket.IO and Node to create a pretty world of particles generated via a Twitter stream.
I’ve previously discussed all the basics of developing virtual reality web experiences in the SitePoint article Bringing VR to the Web with Google Cardboard and Three.js, so if you are new to this whole idea – read that one first and come back. This demo uses the same foundations.
The demo we will be building will watch a live Twitter stream for a keyword. When one is tweeted out whilst it is watching the stream, it will bring up a “tower” of shining particles that represent how long the tweet was. This demo in particular will look for mentions of the word “pizza”. Why pizza you ask? I was looking for a term which was not mentioned as frequently as “bieber” but more frequently than “boxcar racing hyenas”. In short, the best terms are ones which are relatively frequent enough that they’ll appear whilst you are watching, but not so frequent that they come through at many hundreds a second. Pizza is one of them.
Demo Code
If you’re keen to get straight into the code and try it out, you can find it here on GitHub.
Want to try it in action? I’ve got a running version hosted here: VR Twitter World.
Our Server Code
We’ll begin by looking at our Node server code. It will display our flat HTML and also operate as a Socket.IO server that’ll pull in a stream of data from Twitter.
The full server is relatively short and looks like so:
var express = require('express'),
    app = express(),
    server = require('http').createServer(app),
    port = process.env.PORT || 80,
    io = require('socket.io')(server),
    config = require('./config.json'),
    Twitter = require('node-tweet-stream'),
    t = new Twitter(config);

app.get('/', function(request, response) {
  response.sendFile(__dirname + '/public/index.html');
});

app.get(/^(.+)$/, function(req, res) {
  res.sendFile(__dirname + '/public/' + req.params[0]);
});

app.use(function(err, req, res, next) {
  console.error(err.stack);
  res.status(500).send('Something broke!');
});

server.listen(port, function() {
  console.log('Listening on ' + port);
});

t.track('pizza');
t.on('tweet', function(tweet){
  console.log('Roger that. Tweets incoming!');
  console.log(tweet);

  io.emit('tweet', tweet);
});

t.on('error', function (err) {
  console.log('Brace yourself! We are goin doooowwwwwwnnnnnnnn! ', err);
});
Our first lines set up a server using the Node Express framework. It’s a rather simple set up that is pulling in all our dependencies and preparing the app variable for us to access our server functionality. port sets up which port we want our server to run on (process.env.PORT is a server variable some hosting set ups like Heroku will have defined).
var express = require('express'),
    app = express(),
    server = require('http').createServer(app),
    port = process.env.PORT || 80,
Then we set up the io variable whilst simultaneously starting up our Socket.IO server functionality, attaching it to the Express server we set up above:
io = require('socket.io')(server),Setting Up Twitter Access
The config variable is a nice way of keeping the application’s Twitter authentication keys and access tokens in their own file. In order to live view the Twitter stream, we will be using an npm module called node-tweet-stream which provides all the functions we will need. We assign the object for our Twitter access and all associated functions to the t variable, passing in our config JSON to prove we’re allowed to access it.
config = require('./config.json'),
Twitter = require('node-tweet-stream'),
t = new Twitter(config),
If you don’t have any Twitter keys for access to the Twitter API, never fear! You just need to register an app with Twitter. Head to the Twitter Application Management page, log in with your Twitter credentials and then click “Create New App”.
Once you have an app, you can get your keys and access tokens by clicking the “Keys and Access Tokens” link that will appear on your app’s management page. If you can’t find it, it will be at the URL of: https://apps.twitter.com/app/0000000/keys (replacing 0000000 with your app’s ID).
Then, create a file on the same level as index.html called config.json. Within it, add the following with your own app’s values:
{
  "consumer_key": "YOURKEY",
  "consumer_secret": "YOURKEYSECRET",
  "token": "YOURTOKEN",
  "token_secret": "YOURTOKENSECRET"
}
Other Server Basics
Further along in our index.js file, we set up calls to the root of our server to load /public/index.html:
app.get('/', function(request, response) {
  response.sendFile(__dirname + '/public/index.html');
});
We also have it serve up any other static files within the public directory on our server:
app.get(/^(.+)$/, function(req, res) {
  res.sendFile(__dirname + '/public/' + req.params[0]);
});
If we do have an error, we log that error in our server’s console and return a 500 error:
app.use(function(err, req, res, next) {
  console.error(err.stack);
  res.status(500).send('Something broke!');
});
The following lines start our server running with all the settings above.
server.listen(port, function() {
  console.log('Listening on ' + port);
});
Retrieving Our Live Twitter Stream
Finally, we set up our Twitter specific server functionality. We use the track() function to specify which keyword we would like to track in the ever expanding Twitter content stream.
t.track('pizza');We then set up a callback function to run anytime the node-tweet-stream module spots a Tweet with that keyword. If it sees one, we log it in our server’s console log (this is optional, you could remove this if you’d like) and then emit that tweet out as a Socket.IO event to any connected clients.
t.on('tweet', function(tweet){
  console.log('Roger that. Tweets incoming!');
  console.log(tweet);

  io.emit('tweet', tweet);
});
If we have an error for any reason with our Twitter API, it’ll be logged to our server logs:
t.on('error', function (err) {
  console.log('Brace yourself! We are goin doooowwwwwwnnnnnnnn! ', err);
});
All of our server dependencies and details are stored within package.json as with all Node apps. If you are new to Node.js, you might want to read up a bit on what everything means: package.json.
Our Front End Code
Our front end code begins with the same set up from the Bringing VR to the Web with Google Cardboard and Three.js article – a Three.js scene that we display through a stereoscopic effect, bringing our scene into a VR view. To keep this short and sweet, I won’t cover the bits that are the same as the previous demo from that article. If you’re unsure of anything I don’t explain here, check that earlier article for info.
Setting up Socket.IO
The only new JS file we will be adding in comparison to our previous foundation is our Socket.IO JavaScript file. It’s a simple one liner:
<script src="/socket.io/socket.io.js"></script>In order to access the functionality from Socket.IO, all we need is to assign that functionality to the io variable, as you’ll see a little further down in our index.html file:
socket = io(),Preparing Our Towers
We then set up variables for our “towers” (basically our vertical sets of particles that represent a tweet). All of our towers are stored within a THREE.Object3D object called tweetTowers. This is a container object that lets us keep track of all of our towers:
// Towers
tweetTowers = new THREE.Object3D(),
particleTexture and particleMaterial are our variables that will represent how our particles will look:
particleTexture,
particleMaterial,
maxTowerCount is the maximum number of towers we want to be visible in our scene – if this is set too high, we can end up with a laggy experience. I’ve set it to 6000 as this sets the maximum particles to be around about a million. A reasonable number in my opinion!
maxTowerCount = 6000,range is how large of an area around the viewer we want these towers to be placed. The towers will be placed at random spots in the scene, so this limits how far apart they all are placed. I’ve found it is a nicer experience with them closer to the user. If they are further away from the user, it looks like there isn’t as many (despite there being thousands upon thousands of particles!). I set it to 100:
range = 100;Our Init Function
There isn’t too much that is new within our init() function. It mainly sets up our VR camera and controls as explained in the previous article. The new bits are at the end.
We define our particleTexture image to be a png called particle-new.png which we have within our public folder:
particleTexture = THREE.ImageUtils.loadTexture('textures/particle-new.png');We finish the init() function by adding our tweetTowers container to our scene. With this in our scene, we don’t need to worry about adding any of our towers directly into the scene, we just add them into our tweetTowers object directly.
scene.add(tweetTowers);Reacting to Tweets
You’ll recall that once our server finds tweets streaming through Twitter with our keyword of “pizza”, it emits an event called “tweet”. Our client side JavaScript will now watch for that event and respond:
socket.on('tweet', function(tweet) {
  // Our response
});
The response code is a call to a function called generateTower() that will add a tower to our scene representing that tweet. We pass it four values:
generateTower({
  color: parseInt('0x'+ tweet.user.profile_background_color),
  startingCoords: {
    x: getRandomArbitrary(-1*range, range),
    y: 0,
    z: getRandomArbitrary(-1*range, range)
  },
  speed: 5,
  size: (tweet.text.length / 140) * 100
});coloris the color of our particle. We pass in the color of the user’s profile background. This lets us show different colors to represent different hungry users tweeting about pizza.startingCoordsis where the tower will be placed. We want these to be placed around us, so we place them between our range variable above (this should end up between -100 to 100) on the x and z axes. If we placed them randomly on y, they’d start at different levels higher and lower from the ground rather than lining up like buildings. We definitely don’t want that, so we ensure they all are placed at a y position of 0.getRandomArbitrary()is a simple random number generator between the two values.speeddefines how far apart our particles end up placed (or the speed at which the tower rises if they animated upwards).sizeis how many particles high our tower will be. We average it out to a percentage, assuming a maximum Twitter length of 140 characters.
Displaying a Tower
Our generateTower() function itself begins by defining a towerGeometry variable. This is a THREE.Geometry object that will contain the positions of all of our particles within the tower. Keeping all of the points tracked within one Geometry object can help keep processing times down, as Three.js only needs to track each tower object and its points, rather than a range of independent particles. Later in the code, we will provide the geometry to a THREE.PointCloud object which can interpret those points into our particles.
function generateTower(options) {
  var towerGeometry = new THREE.Geometry();

  // The rest of our code
}
We then set up a JavaScript object called particleMovements that stores where our particles will start and finish within the tower, along with how far apart they’ll be (the values we passed in earlier):
var particleMovements = {
  start: 0,
  end: options.size,
  speed: options.speed
};
The currentCoords variable tracks the last position of a particle within the tower. We initialize it at 0,0,0. The startingCoords where the tower will be placed are parsed in from the function call earlier. If we don’t have any starting co-ordinates from the function call, we initialize them to be the same as currentCoords:
var currentCoords = {x: 0, y: 0, z: 0},
    startingCoords = options.startingCoords ? options.startingCoords : currentCoords;
We then iterate through the size of our tower to create each particle. We set the current co-ordinates for y to increase by our speed value multiplied by i. Our x and z values remain at their starting spots as we’re only moving upwards.
for (var i = 0; i < options.size; i++) {
  currentCoords = {
    x: startingCoords.x,
    y: startingCoords.y + particleMovements.speed * i,
    z: startingCoords.z
  };
With those co-ordinates defined for this particle, we attach that particle’s position as a vertex in our towerGeometry object:
towerGeometry.vertices.push(new THREE.Vector3(currentCoords.x, currentCoords.y, currentCoords.z));That ensures our positioning of the particles is set correctly. Next, we define what the particles in this tower will look like within the particleMaterial variable. Our particles will be placed within a THREE.PointCloud object and thus to style them, we will use a THREE.PointCloudMaterial material:
particleMaterial = new THREE.PointCloudMaterial({
  map: particleTexture,
  color: options.color,
  blending: THREE.AdditiveBlending,
  transparent: true,
  size: 4
});mapdefines the image we will be using for the particle, we pass in theparticleTexturewe defined earlier.colorpasses in the color we want the particle to be (defaults to0xffffffin Three.js).blendingsets up how the particles blend into the scene.THREE.AdditiveBlendingadds the color of the texture to the one behind it.transparentensures blending can happen as it requires a level of transparency to work.sizeis the size of our particles.
Finally, we define our tower’s point cloud within the variable of tower. We pass in our geometry containing the points we want each particle to appear on, as well as the material we defined above for each of them.
var tower = new THREE.PointCloud(towerGeometry, particleMaterial);We add that tower to our tweetTowers collection object and then check to see how many towers are in the scene. If we have more towers than our maximum allowed, we hide the oldest one to reduce the load on the device. If you have any performance issues, chances are they’ll be a bit better if you reduce the maxTowerCount!
tweetTowers.add(tower);
if (tweetTowers.children.length > maxTowerCount) {
  tweetTowers.children[tweetTowers.children.length - maxTowerCount].visible = false;
}
Running Our Code
To run this demo locally, you’ll need Node installed and you’ll need to run the usual commands. Install all dependencies for the project:
npm installThen run it:
node index.jsIn order to test this on your smartphone, you will either need to ensure your smartphone is on the same local network and find your computer’s IP address, or use a tunnelling service like ngrok (I cover how to use ngrok in the article on Accessing Localhost From Anywhere).
You could also host the Node server somewhere. I personally used Heroku, however this is completely personal preference.
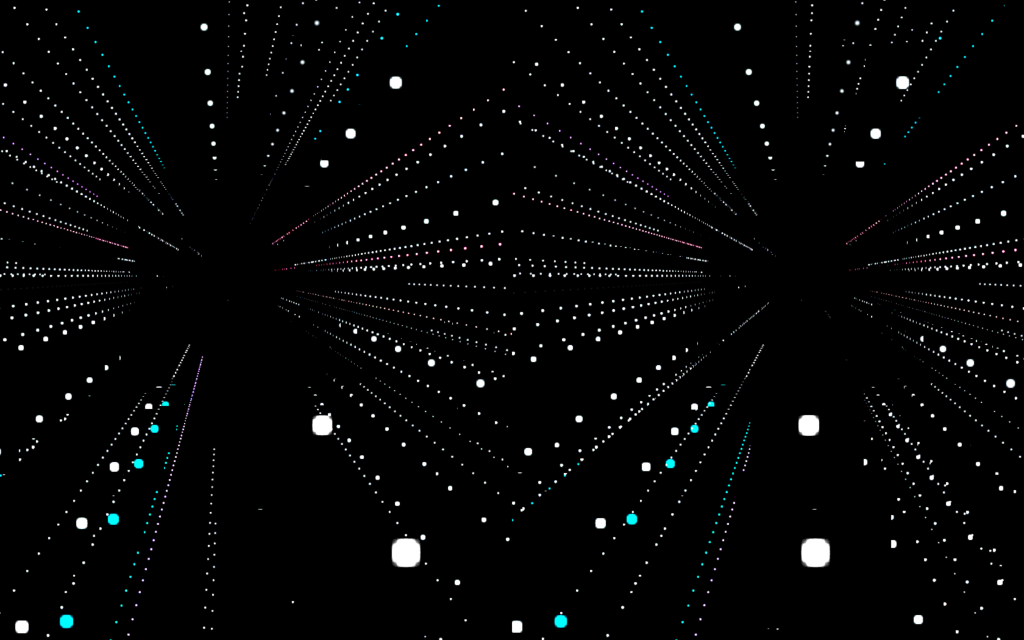
Once you’ve got the server somewhere up and running, open up Chrome for Mobile and visit it! Put on your Google Cardboard or other similar headset and you should see an experience that after half a minute or so looks like this if you look up:
Conclusion
This should have given you a good overview of using Node, Socket.IO and Three.js to create a 3D web API enabled virtual reality visualization. The demo itself could be developed further, adding more keywords, filters, making it run smoother with more particles and so on. There is plenty of potential! Feel free to get out there and try to make your own fantastic experience from this demo!
I’ve also got other demos here at SitePoint that use similar concepts but instead brings them into an augmented reality experience. If you are interested, Filtering Reality with JavaScript and Google Cardboard explores taking in the camera from your smartphone and adding filters to it, and Augmented Reality in the Browser with Awe.js explores going all the way and augmenting elements into your field of view via the ever powerful combination of Three.js and Awe.js!
If you do take on the challenge of putting together your own VR visualization from the demo in this article (or combining it with elements from the AR examples mentioned), leave a note in the comments or get in touch with me on Twitter (@thatpatrickguy), I’ll get out my headset and take a look!
Frequently Asked Questions (FAQs) about Visualizing a Twitter Stream in VR with Three.js and Node
How can I set up Twitter for websites?
Setting up Twitter for websites involves a few steps. First, you need to create a Twitter application on the Twitter Developer’s site. After creating the application, you will receive a set of keys and tokens. These are used to authenticate your application with Twitter. You then need to install the Twitter JavaScript API on your website. This API allows your website to interact with Twitter, enabling features like Tweet buttons and embedded Tweets.
What is Three.js and how does it work?
Three.js is a cross-browser JavaScript library that is used to create and display animated 3D computer graphics in a web browser. It uses WebGL to render graphics. The library provides a set of objects and methods that make it easier to create complex 3D scenes, including cameras, lights, materials, and geometries.
How can I use Three.js on Node.js?
To use Three.js on Node.js, you need to install the ‘three’ package using npm, the Node.js package manager. Once installed, you can require the ‘three’ module in your Node.js scripts. You can then use the Three.js API to create 3D graphics.
How can I visualize a Twitter stream in VR?
Visualizing a Twitter stream in VR involves several steps. First, you need to set up a Twitter stream using the Twitter API. This involves creating a Twitter application and authenticating it with your Twitter account. Once the stream is set up, you can use Three.js to create a 3D visualization of the Tweets. This involves creating a 3D scene, adding objects to represent Tweets, and updating the scene in real-time as new Tweets arrive.
What are the key differences between Three.js and other 3D graphics libraries?
Three.js is a high-level library that provides a simple API for creating 3D graphics. It abstracts away many of the complexities of working with WebGL directly, making it easier to create complex 3D scenes. Other libraries may provide more low-level access to WebGL, but require a deeper understanding of 3D graphics programming.
How can I handle errors when setting up a Twitter stream?
When setting up a Twitter stream, errors can occur for a variety of reasons, such as network issues or incorrect authentication credentials. The Twitter API provides error messages that can help you diagnose and fix these issues. It’s important to handle these errors in your code to ensure your application continues to run smoothly.
How can I optimize the performance of my Three.js application?
Optimizing a Three.js application involves a variety of techniques. These include reducing the complexity of your 3D models, optimizing your textures, and minimizing the number of draw calls. You can also use tools like the Three.js inspector to analyze the performance of your application and identify bottlenecks.
How can I customize the appearance of my Twitter stream in VR?
You can customize the appearance of your Twitter stream in VR by modifying the properties of the 3D objects that represent Tweets. This includes properties like color, texture, and size. You can also use different types of lights and cameras to change the overall look and feel of the scene.
How can I add interactivity to my Twitter stream in VR?
Adding interactivity to your Twitter stream in VR involves using event listeners to detect user actions, such as clicks or touches. You can then update the 3D scene in response to these actions. For example, you could allow users to select Tweets by clicking on them, or navigate through the scene using touch gestures.
How can I deploy my Three.js application to the web?
Deploying a Three.js application to the web involves packaging your application files and uploading them to a web server. You can use tools like Webpack to bundle your JavaScript files, and services like GitHub Pages or Netlify to host your application. Once deployed, your application will be accessible to anyone with a web browser.
 Patrick Catanzariti
PatCat is the founder of Dev Diner, a site that explores developing for emerging tech such as virtual and augmented reality, the Internet of Things, artificial intelligence and wearables. He is a SitePoint contributing editor for emerging tech, an instructor at SitePoint Premium and O'Reilly, a Meta Pioneer and freelance developer who loves every opportunity to tinker with something new in a tech demo.