- Introducing RethinkDB
- Installing Rethinkdb
- Installing the Node.js Client Rethinkdbdash
- Getting Started with RethinkDB
- Creating a Database
- Creating a Table
- Inserting Data
- Selecting Data from Table
- Pushing Update in Real Time
- Conclusions
- Frequently Asked Questions (FAQs) on Using RethinkDB with Node.js Applications
Introducing RethinkDB
RethinkDB is an open source JSON database built for real time Web. The official documentation states:RethinkDB is the first open-source, scalable JSON database built from the ground up for the realtime web. It inverts the traditional database architecture by exposing an exciting new access model – instead of polling for changes, the developer can tell RethinkDB to continuously push updated query results to applications in realtime.It provides the functionality to get real time updates from the database each time a change occurs. RethinkDB targets applications which require to send real time updates to the connected clients. For example, let’s consider an application that enables users to collaboratively design a plan. When a particular user makes a design change, it needs to be pushed to the other connected clients in real time to keep the design in sync. RethinkDB can be used in such cases to make real time updates possible. Having clarified what RethinkDB could be useful for, let’s seen now how to install it.
Installing Rethinkdb
To install RethinkDB on Ubuntu, you need to add the repository.source /etc/lsb-release && echo "deb http://download.rethinkdb.com/apt $DISTRIB_CODENAME main" | sudo tee /etc/apt/sources.list.d/rethinkdb.list
wget -qO- http://download.rethinkdb.com/apt/pubkey.gpg | sudo apt-key add -sudo apt-get update
sudo apt-get install rethinkdbrethinkdbInstalling the Node.js Client Rethinkdbdash
In the introduction of this tutorial, I have mentioned rethinkdbdash, the Node.js client we’ll use for interacting with the RethinkDB server. It isan advanced Node.js driver for RethinkDB with a connection pool, support for streams, etc.To install the
rethinkdbdash client, you can use npm:
npm install rethinkdbdashGetting Started with RethinkDB
We’ll start by creating a database calledSitePoint for our demo app. As the first step, create a project folder called NodeRethinkDB. Then, create a file called app.js inside the project directory.
Once done, import the client module in the app.js file as shown below:
var r = require('rethinkdbdash')();28015 and hosts localhost. In case you need a different configuration, you can set it as follows:
var r = require('rethinkdbdash')({
port: 28015,
host: 'localhost'
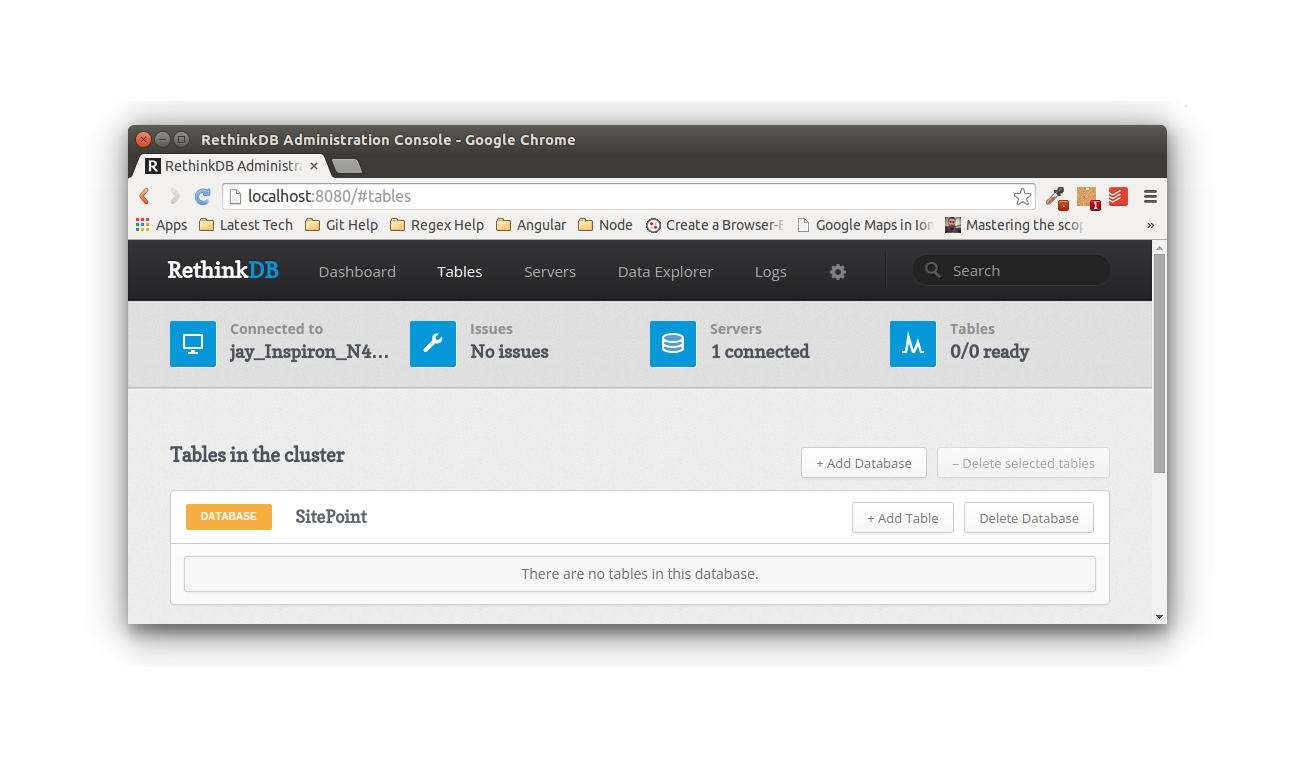
});Creating a Database
With the previous statement in place, we can create a database. This is done by using thedbCreate method.
r.dbCreate('SitePoint')
.run()
.then(function(response){
	console.log(response);
})
.error(function(err){
	console.log('error occured ', err);
});{
config_changes: [ { new_val: [Object], old_val: null } ],
dbs_created: 1
}SitePoint database.
Creating a Table
Now we’ll see how to create a table in a RethinkDB database, using therethinkdbdash client. First, set up a connection to the database using the client.
var r = require('rethinkdbdash')({
	port: 28015,
	host: 'localhost',
	db: 'SitePoint'
});tableCreate method to create a table Employee in the database.
r.tableCreate('Employee')
.run()
.then(function(response){
	console.log(response);
})
.error(function(err){
	console.log('error while creating table ', err);
})id. If you want, you can specify it while creating the table.
r.tableCreate('Employee',{ primaryKey: 'name' })
.run()
.then(function(response){
	console.log(response)
})
.error(function(err){
	console.log('error while creating table ',err)
})Creating a pool connected to localhost:28015
{
config_changes: [ { new_val: [Object], old_val: null } ],
tables_created: 1
}Inserting Data
To insert data into theEmployee table, we’ll make use of the insert method.
r.table("Employee")
.insert({
    name: "Jay",
    company: "SitePoint"
})
.run()
.then(function(response){
	console.log('Success ',response);
})
.error(function(err){
	console.log('error occurred ',err);
})Employee table and return the successful message. Here is the response from the query above:
Creating a pool connected to localhost:28015

Success

{
  deleted: 0,
  errors: 0,
  generated_keys: [ 'f64a2bdb-1659-47a9-9bc1-89e8f1ebb2ac' ],
  inserted: 1,
  replaced: 0,
  skipped: 0,
  unchanged: 0
}id field. If we prefer, we can do it. Otherwise, it will have an autogenerated unique identifier value.
Selecting Data from Table
Selecting data from the table is quite straightforward. We need to specify the name of the table and the data gets selected.r.table('Employee')
.run()
.then(function(response){
console.log(response);
})
.error(function(err){
console.log(err);
})[{
EmpId: 'bc95940f-084c-48c5-b9fe-dc0a82f380b6',
name: 'Jay',
company: 'SitePoint'
}]Selecting Specific Records from Table
We employ theget method to get records with a particular primary key. For example, if we want to select an Employee with an EmpId of bc95940f-084c-48c5-b9fe-dc0a82f380b6, this is the query we must run:
r.table('Employee')
.get('bc95940f-084c-48c5-b9fe-dc0a82f380b6')
.run()
.then(function(response){
console.log(response);
})
.error(function(err){
console.log(err);
})Employee with ID bc95940f-084c-48c5-b9fe-dc0a82f380b6 as reported below:
[{
    EmpId: 'bc95940f-084c-48c5-b9fe-dc0a82f380b6',
    name: 'Jay',
    company: 'SitePoint'
}]Pushing Update in Real Time
One of the most important features of the RethinkDB is its ability to push changes in real time, which reduces the polling overhead. From the official docs you can read:Instead of polling for changes, the developer can tell RethinkDB to continuously push updated query results in realtime.Pushing updates can be achieved by subscribing to the realtime feeds. For example, we can subscribe for any changes in the
Employee table as shown below:
r.table('Employee')
.changes()
.run()
.then(function(cursor){
	cursor.each(console.log);
})
.error(function(err){
	console.log(err);
});Employee, in the terminal we’ll see a log as the following:
{
  new_val: {
     EmpId: '57937293-850b-45af-aeb3-e30d2dfd83a2',
     company: 'SitePoint',
     name: 'Raj'
  },
  old_val: null
}old_val is null and new_val has value. In case an existing record gets updated, we will have both the old_val and the new_val.
Conclusions
In this tutorial, we’ve seen how to use RethinkDB with Node.js applications thanks to the RethinkDB Node.js driver called rethinkdbdash.If you want to deepen the topic, I suggest you to take a look at the official documentation and at the Rethink Db JavaScript command reference. Have you ever used any other client for connecting to RethinkDB from Node.js? Share your thoughts and suggestions in the comments below!
Frequently Asked Questions (FAQs) on Using RethinkDB with Node.js Applications
What are the benefits of using RethinkDB with Node.js applications?
RethinkDB is a powerful open-source database that stores JSON documents. When used with Node.js, it offers real-time push notifications. This means that instead of constantly polling the database for changes, your application gets updated data as soon as it changes. This feature is particularly useful for real-time applications like live chats, multiplayer games, and collaborative tools. Additionally, RethinkDB offers a flexible query language that allows you to join, transform, and aggregate data, making it easier to work with complex data structures.
How do I install RethinkDB and set it up with Node.js?
To install RethinkDB, you can download it from the official website and follow the installation instructions for your operating system. Once installed, you can start the RethinkDB server by running the command ‘rethinkdb’ in your terminal. To set it up with Node.js, you need to install the RethinkDB driver for Node.js using npm, the Node.js package manager. You can do this by running the command ‘npm install rethinkdb’ in your terminal. Once installed, you can require the RethinkDB module in your Node.js application and connect to the RethinkDB server.
How do I create a table in RethinkDB using Node.js?
To create a table in RethinkDB using Node.js, you first need to establish a connection to the RethinkDB server. Once connected, you can use the ‘r.db().tableCreate()’ method to create a new table. This method takes the name of the table as a parameter. Here’s an example:r.connect({ host: 'localhost', port: 28015 }, function(err, conn) {
if(err) throw err;
r.db('test').tableCreate('new_table').run(conn, function(err, res) {
if(err) throw err;
console.log(res);
conn.close();
});});
How do I insert data into a RethinkDB table using Node.js?
To insert data into a RethinkDB table using Node.js, you can use the ‘r.table().insert()’ method. This method takes an object or an array of objects representing the data you want to insert. Here’s an example:r.connect({ host: 'localhost', port: 28015 }, function(err, conn) {
if(err) throw err;
r.table('new_table').insert({ id: 1, name: 'John Doe' }).run(conn, function(err, res) {
if(err) throw err;
console.log(res);
conn.close();
});});
How do I query data from a RethinkDB table using Node.js?
To query data from a RethinkDB table using Node.js, you can use the ‘r.table().get()’ method for retrieving a single document, or the ‘r.table().filter()’ method for retrieving multiple documents that match a certain condition. Here’s an example:r.connect({ host: 'localhost', port: 28015 }, function(err, conn) {
if(err) throw err;
r.table('new_table').get(1).run(conn, function(err, res) {
if(err) throw err;
console.log(res);
conn.close();
});});
How do I update data in a RethinkDB table using Node.js?
To update data in a RethinkDB table using Node.js, you can use the ‘r.table().get().update()’ method. This method takes an object representing the new data. Here’s an example:r.connect({ host: 'localhost', port: 28015 }, function(err, conn) {
if(err) throw err;
r.table('new_table').get(1).update({ name: 'Jane Doe' }).run(conn, function(err, res) {
if(err) throw err;
console.log(res);
conn.close();
});});
How do I delete data from a RethinkDB table using Node.js?
To delete data from a RethinkDB table using Node.js, you can use the ‘r.table().get().delete()’ method. Here’s an example:r.connect({ host: 'localhost', port: 28015 }, function(err, conn) {
if(err) throw err;
r.table('new_table').get(1).delete().run(conn, function(err, res) {
if(err) throw err;
console.log(res);
conn.close();
});});
How do I handle errors in RethinkDB using Node.js?
When working with RethinkDB and Node.js, errors can be handled using the standard Node.js error handling techniques. This typically involves passing an error object to a callback function, and then checking if the error object is null before proceeding. If the error object is not null, an error has occurred and you can handle it accordingly. Here’s an example:r.connect({ host: 'localhost', port: 28015 }, function(err, conn) {
if(err) {
console.error('An error occurred:', err);
return;
}
// Proceed with the rest of the code...});
How do I listen for real-time updates in RethinkDB using Node.js?
To listen for real-time updates in RethinkDB using Node.js, you can use the ‘r.table().changes()’ method. This method returns a cursor that you can use to listen for changes to the table. Here’s an example:r.connect({ host: 'localhost', port: 28015 }, function(err, conn) {
if(err) throw err;
r.table('new_table').changes().run(conn, function(err, cursor) {
if(err) throw err;
cursor.each(function(err, row) {
if(err) throw err;
console.log(row);
});
});});
How do I close a connection to a RethinkDB server using Node.js?
To close a connection to a RethinkDB server using Node.js, you can use the ‘conn.close()’ method. This method closes the connection and releases all resources associated with it. Here’s an example:r.connect({ host: 'localhost', port: 28015 }, function(err, conn) {
if(err) throw err;
// Do some work...
conn.close(function(err) {
if(err) throw err;
console.log('Connection closed');
});});
 Jay Raj
Jay is a Software Engineer and Writer. He blogs occasionally at Code Handbook and Tech Illumination.