LCDs. They’re fun. It’s one of the coolest ways to bring a voice to your Arduino as it speaks through glowing text. In this article we’re going to explore how to bring in data from a web API and display it on your Arduino’s LCD using Node.js.
My favourite meetup of every month here in Sydney is the IoT Sydney meetup. It’s a great meetup (you should come along!). At the end of every meetup, there is a random prize draw for those who RSVPed. I thought it was about time that this was done in true IoT style, so I put together a quick Arduino LCD set up that pulls in Meetup.com event RSVP info and then randomly selects a lucky member. Thought it might be a nice surprise and way easier than drawing names out of a hat!
It also falls in neatly with the current series of Internet of Things articles I’m writing here at SitePoint. I’m exploring the many different IoT possibilities out there with various devices. Last week, I looked at using IoT data in the Unity game engine and before that, I looked at how to pull in data from the Jawbone Up.
Let’s get started!
Your Arduino Sketch
The sketch we’ll be using for this example looks like so:
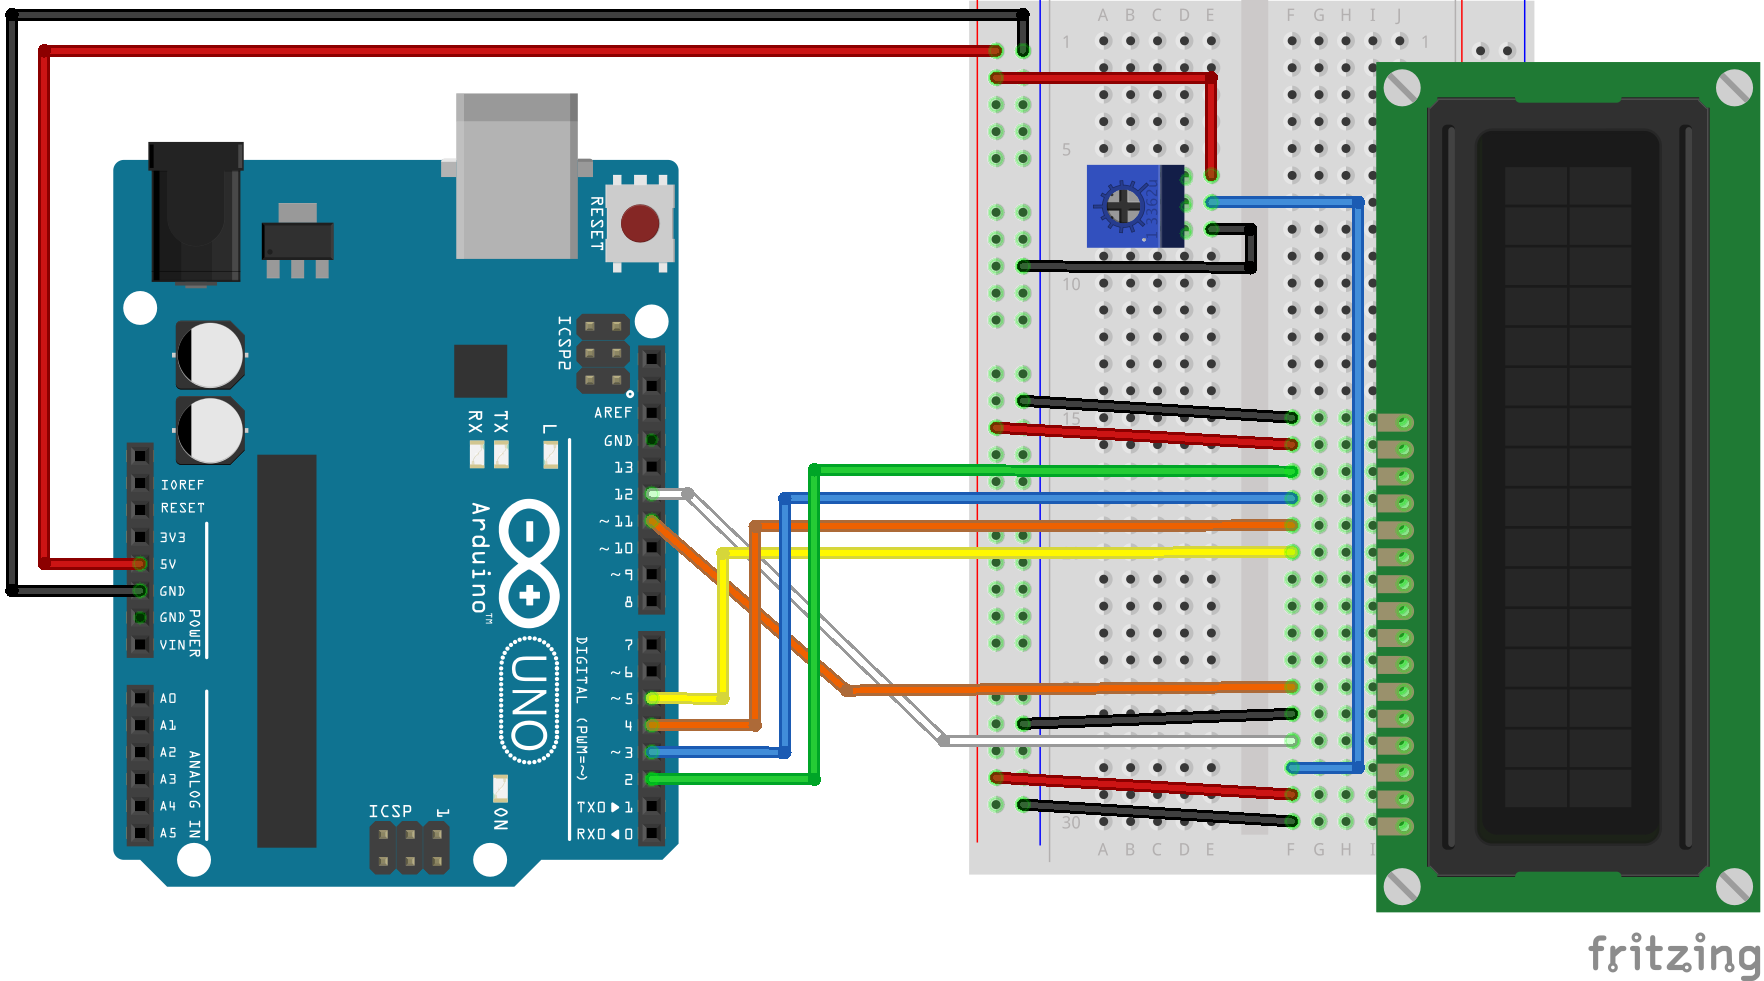
It is a slightly modified version of the one you’ll find in the Sparkfun Inventors Kit. There are other variations of LCD sketches you’ll find online that rearrange how things are connected up but will work the same way. You might just need to adjust which pins you define in the JavaScript below.
Our JavaScript Code
In our Node.js JavaScript file, we include the following:
var express = require('express'),
	app = express(),
	server = require('http').Server(app),
	port = 5000,
	five = require('johnny-five'),
	request = require('request'),
	_ = require('underscore'),
	board = new five.Board(),
	lcd;

board.on('ready', function() {
	lcd = new five.LCD({
		pins: [12, 11, 5, 4, 3, 2],
		rows: 2,
		cols: 16
	});

	this.repl.inject({
		lcd: lcd
	});
});

app.get('/chooseMember/:event_id', function(req, resp) {
	request({
		url: 'https://api.meetup.com/2/rsvps?key=474cc9332345ea7d7e135f50653c&event_id='+req.params.event_id,
		json: true
	}, function(error, response, body) {
		var members = _.pluck(body.results, 'member'),
			randomMember = members[_.random(members.length - 1)];

		resp.json(randomMember);

		console.log(randomMember.name);

		lcd.clear().print(randomMember.name);
	});
});

server.listen(port, function() {
  console.log('Listening on ' + port);
});
Setting This Up Step By Step
If you’re pretty clued into Node.js, much of that code will already make sense to you. I’ll explain each bit just to ensure everyone is on the same page and provide guidance along the way on anything else we’ll need to set up.
To start with, we set up our express server variables in preparation to run a localhost server on port 5000:
var express = require('express'),
	app = express(),
	server = require('http').Server(app),
	port = 5000,
We’ve then got a rather important thing to include, johnny-five. This is the npm library which gives us access to the functions we’ll need to control our Arduino via Node.js.
five = require('johnny-five'),After that, we’re including the request module. We’ll be using this to make http requests from our Node.js server to the Meetup API.
request = require('request'),To keep things very clean and simple, we’ll be using underscore to go through the arrays of data.
_ = require('underscore'),The final two variables are the board and lcd variables that we’ll use to store the Arduino objects that johnny-five creates.
board = new five.Board(),
	lcd;
We begin by waiting for our Arduino board to be ready to access, johnny-five sends a “ready” event when our board is ready to go.
board.on('ready', function() {Once our board is ready to go, we let johnny-five know what sort of LCD we’ve got connected. We define the pins from top to bottom in an array:
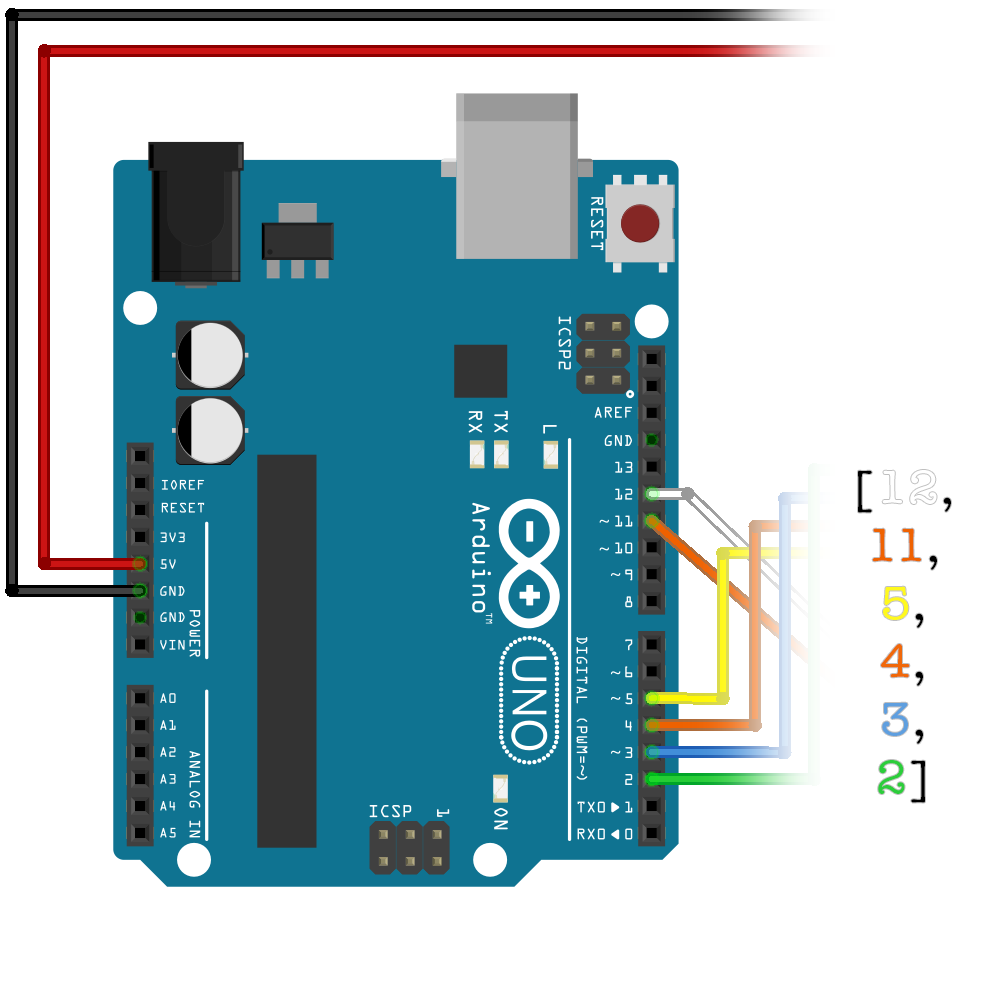
We also define how many rows and columns our LCD has. In my case it is a 2×16 LCD. All of this looks like so:
lcd = new five.LCD({
	pins: [12, 11, 5, 4, 3, 2],
	rows: 2,
	cols: 16
});
Then we’ve got code which is optional (but handy to include) that will allow us to access the LCD functions from our command line as it is running (I’ll show this in action later in the article):
this.repl.inject({
	lcd: lcd
});
Then, we have our one and only GET request that we’ve set up. In this request, we are expecting an event ID within the URL. For example: http://localhost:5000/chooseMember/221960710. The event ID is the one that you’ll find in the address bar when you visit the event’s page:
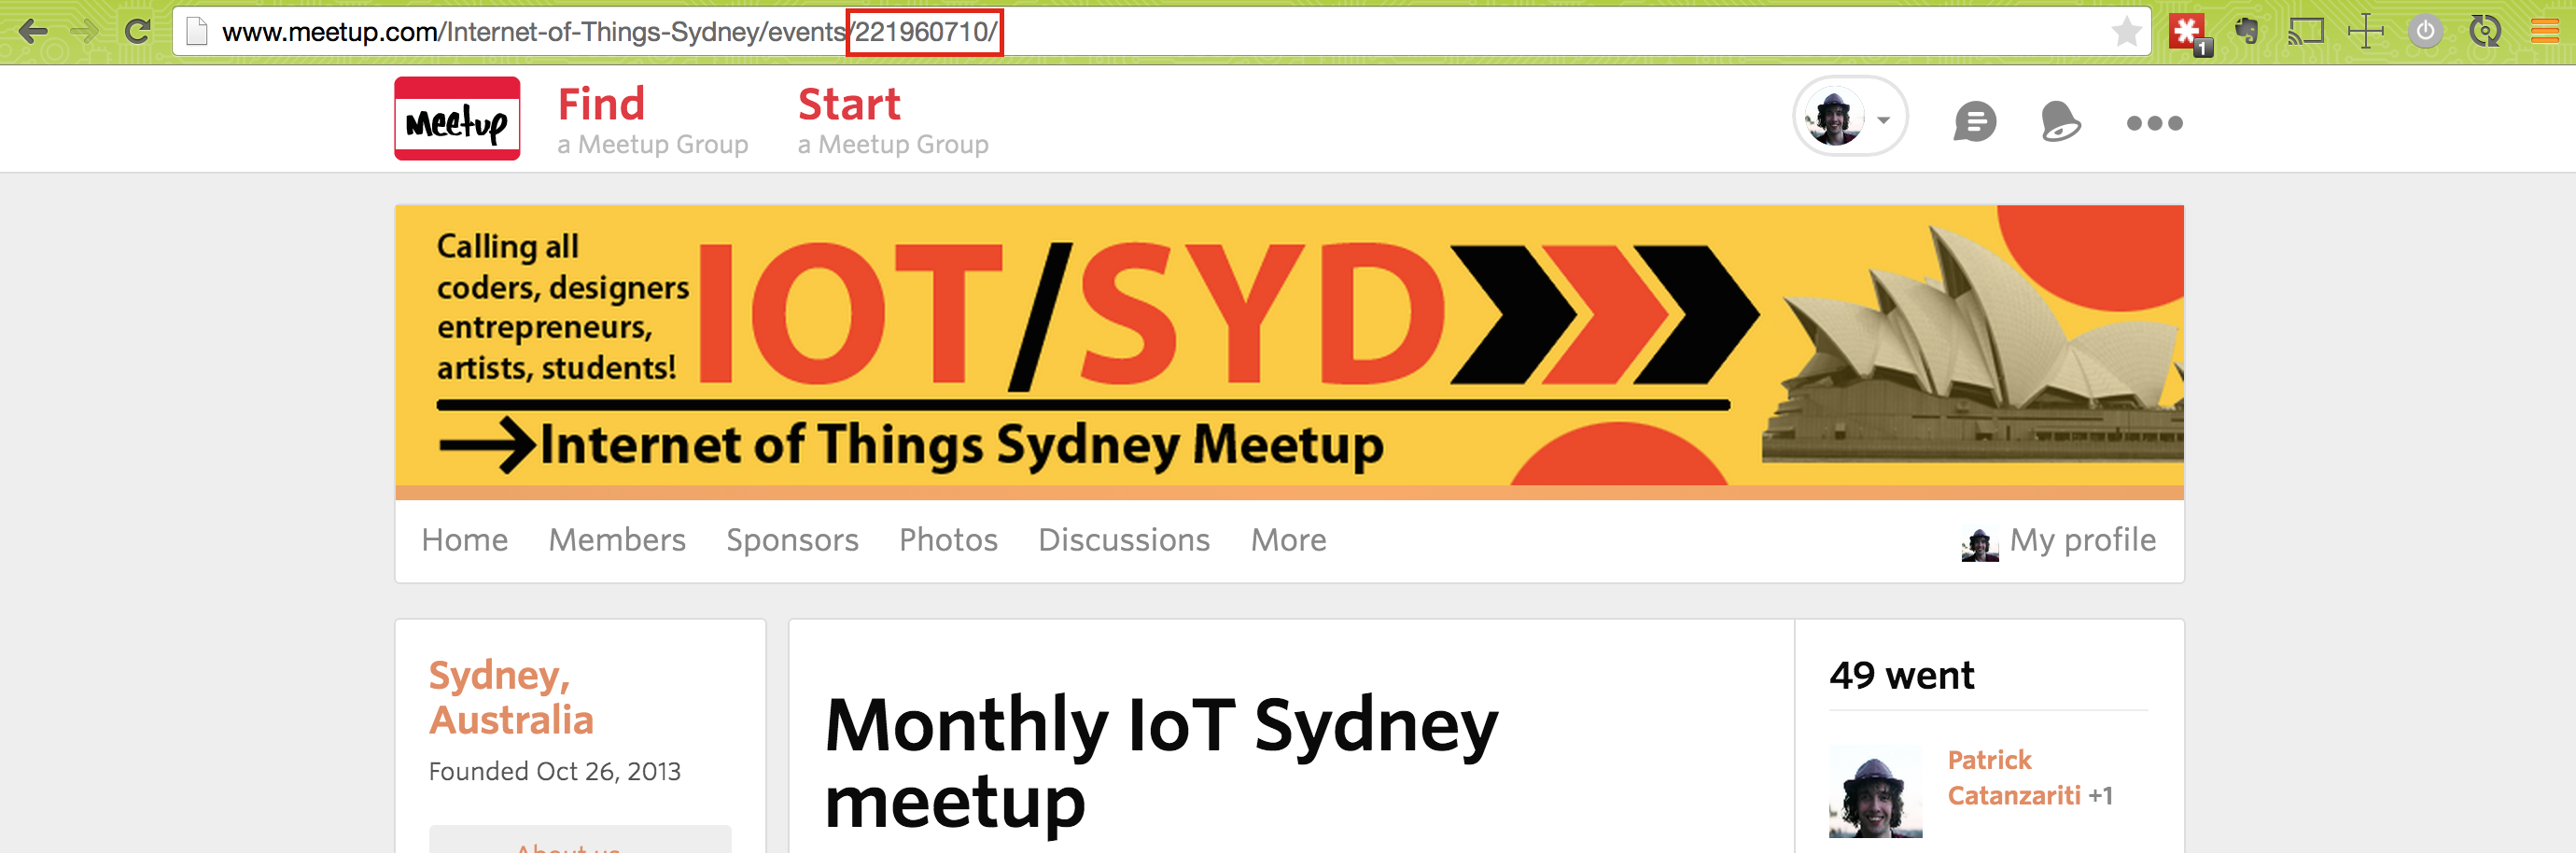
Our GET request looking for this ID looks like so:
app.get('/chooseMember/:event_id', function(req, resp) {Then we get to the complex bit of the code! Our actual HTTP request to the Meetup API. We access this via the request function. We pass in two things here, our http options for the request and our callback function.
The options for our http call contain our url and a boolean to let the request know we’re expecting a JSON object back. This looks like so:
request({
url: 'https://api.meetup.com/2/rsvps?key=089cc9874628ealkjh27dkb50653s&event_id='+req.params.event_id,
json: true
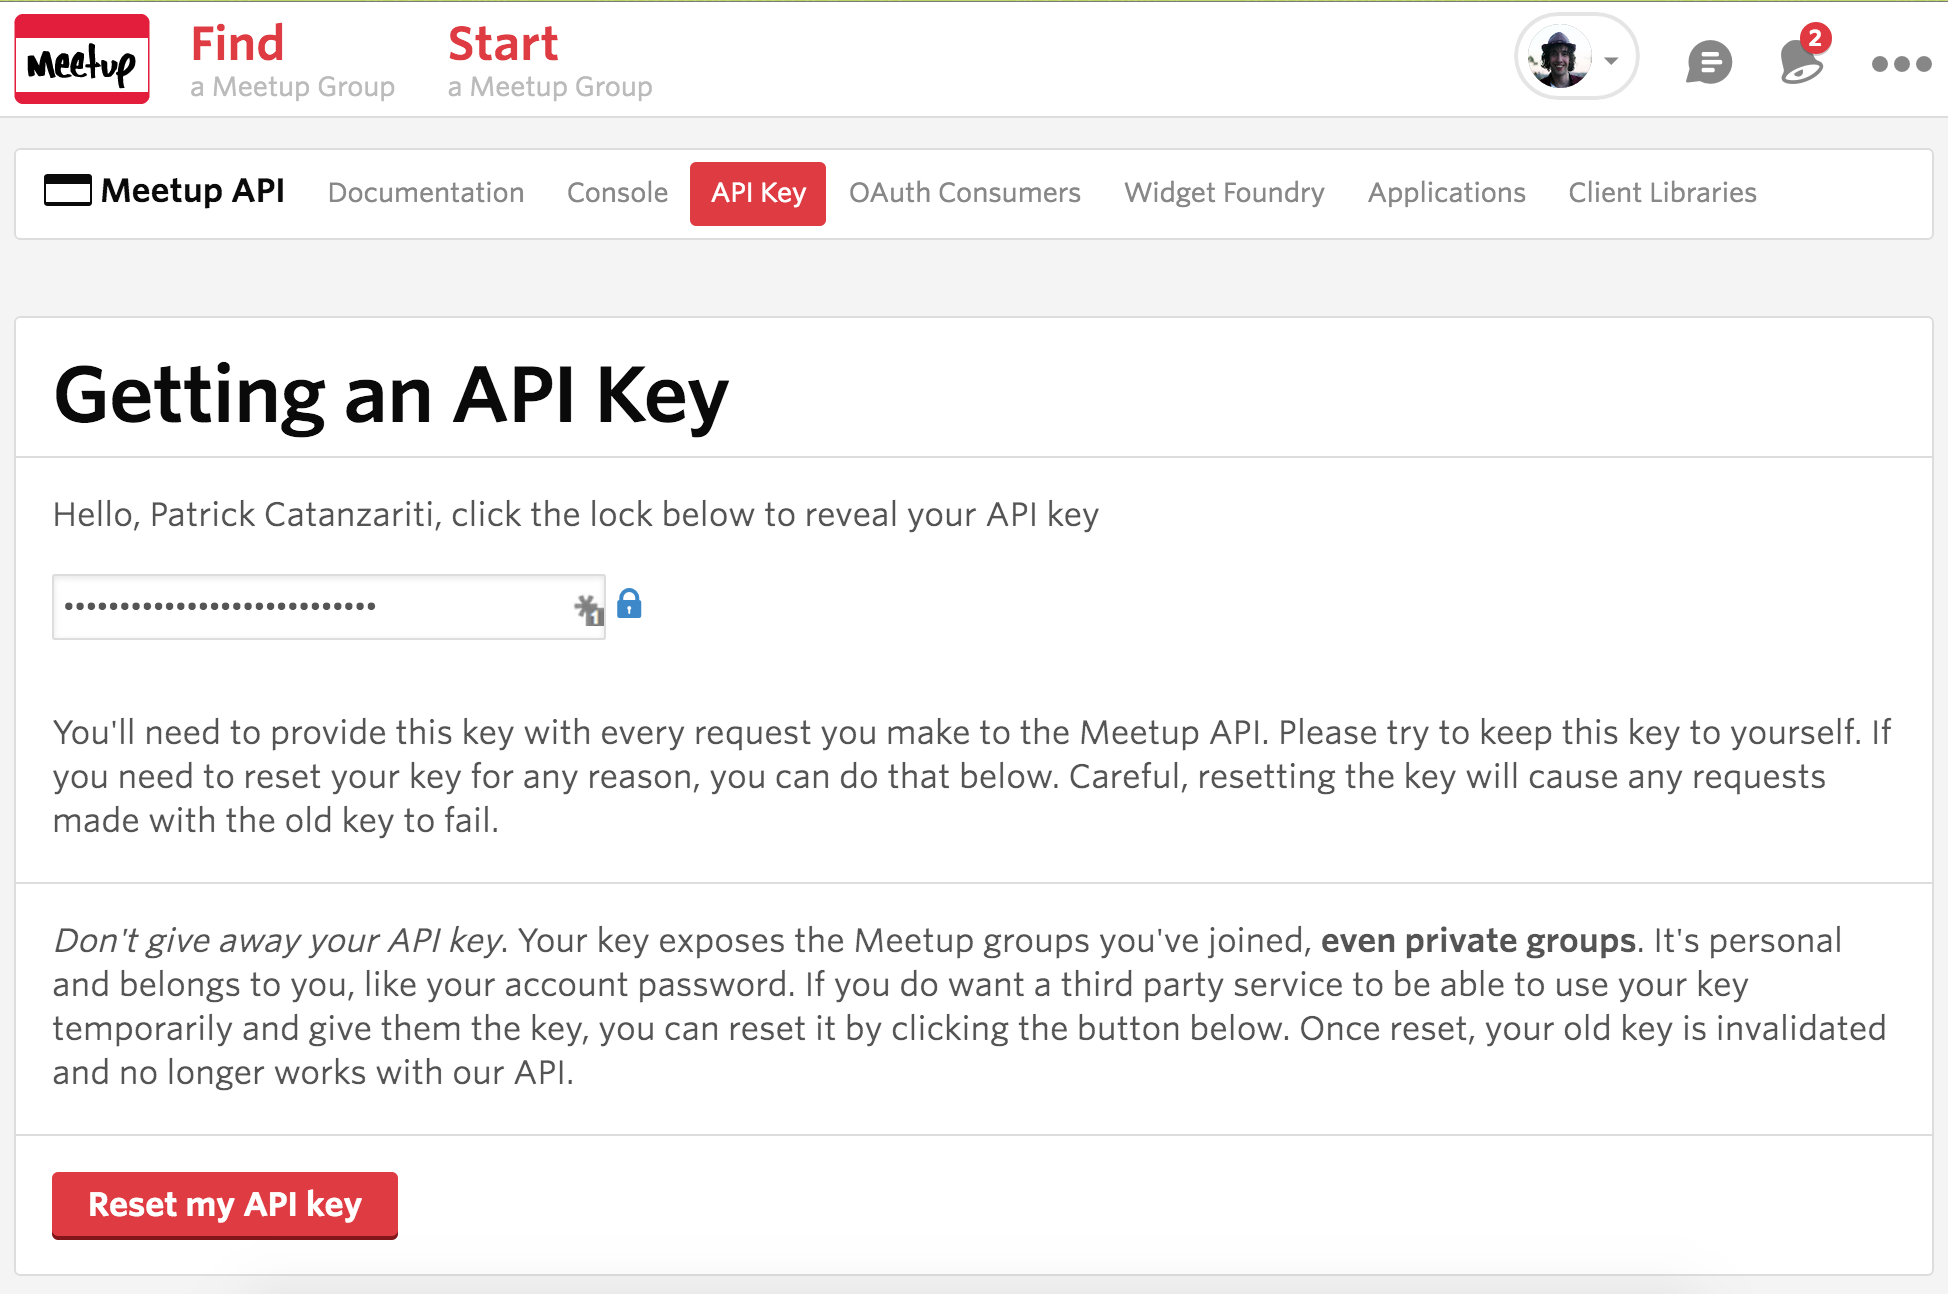
}Keen observers will have noticed we pass in our event ID from the URL string into the request URL using req.params.event_id. However there’s another string of characters in there which I haven’t explained. In order to access the Meetup API you’ll need an API key. You can find one of these at https://secure.meetup.com/meetup_api/key/:
Finally, we’ve got our callback function which uses the returned JSON data. I’ve kept it simple and without error handling, however if this is a serious production level creation – add a check for the error variable.
The JSON output that the callback will return in our body variable looks like so:
{
  "venue": {
    "country": "au",
    "city": "Sydney",
    ...
  },
  "created": 1428838649000,
  "response": "yes",
  "member_photo": {
    "highres_link": "http://photos1.meetupstatic.com/photos/member/2/c/6/c/highres_161711372.jpeg",
    "photo_id": 161711372,
    ...
  },
  "guests": 0,
  "member": {
    "member_id": 098361926,
    "name": "Patrick Catanzariti"
  },
  ...
We filter out a lot of that by using the _.pluck() function in underscore. This will help us focus on the important bit of our API – the members who RSVPed. The _.pluck() function goes through the results array and takes only the member info from each one.
function(error, response, body) {
  var members = _.pluck(body.results, 'member'),
Then, we use the _.members() underscore function to randomly select a member from the resulting array.
randomMember = members[_.random(members.length - 1)];We return that data through our express server as a JSON response to the GET request and log the name in our console so we can see who was chosen:
resp.json(randomMember);
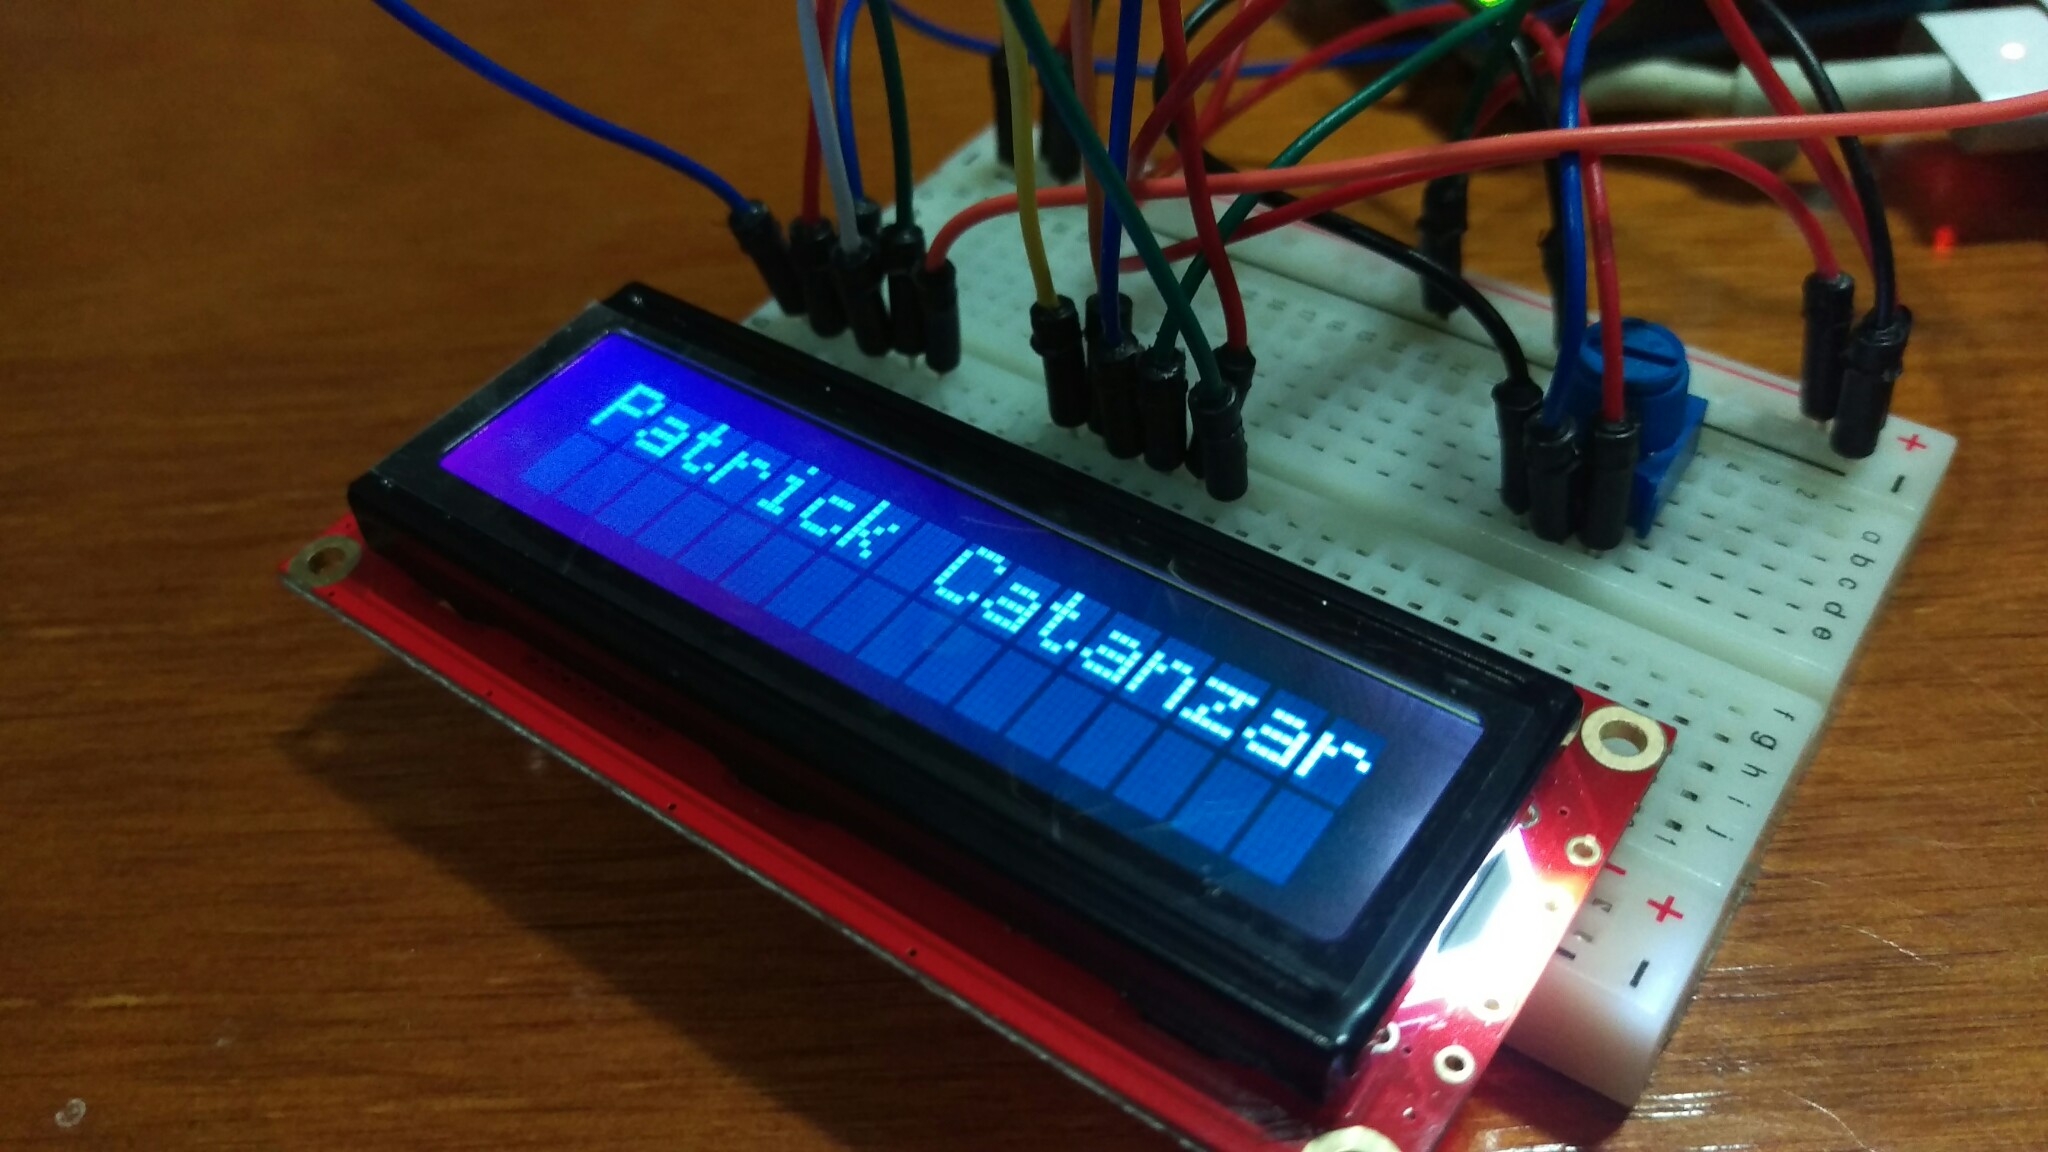
console.log(randomMember.name);Then we use the lcd johnny-five object we set up earlier to print out the name of the member onto our LCD. We start by using lcd.clear() to clear the LCD of anything currently on it and then use lcd.print() to print out the name characters.
lcd.clear().print(randomMember.name);
});
You’ll notice when you run this that some long names will get cut off, rather than wrap to the other line. If you’d like to wrap things onto a second line, try separating your randomMember.name into two 16 character strings, print the first string and then use lcd.cursor(1, 0); to move to the second line before printing the second one. In my case, it wasn’t needed as all we really need is to be able to tell whose name was drawn – a few missing characters usually won’t cause issues here.
Getting That Running On Your Arduino
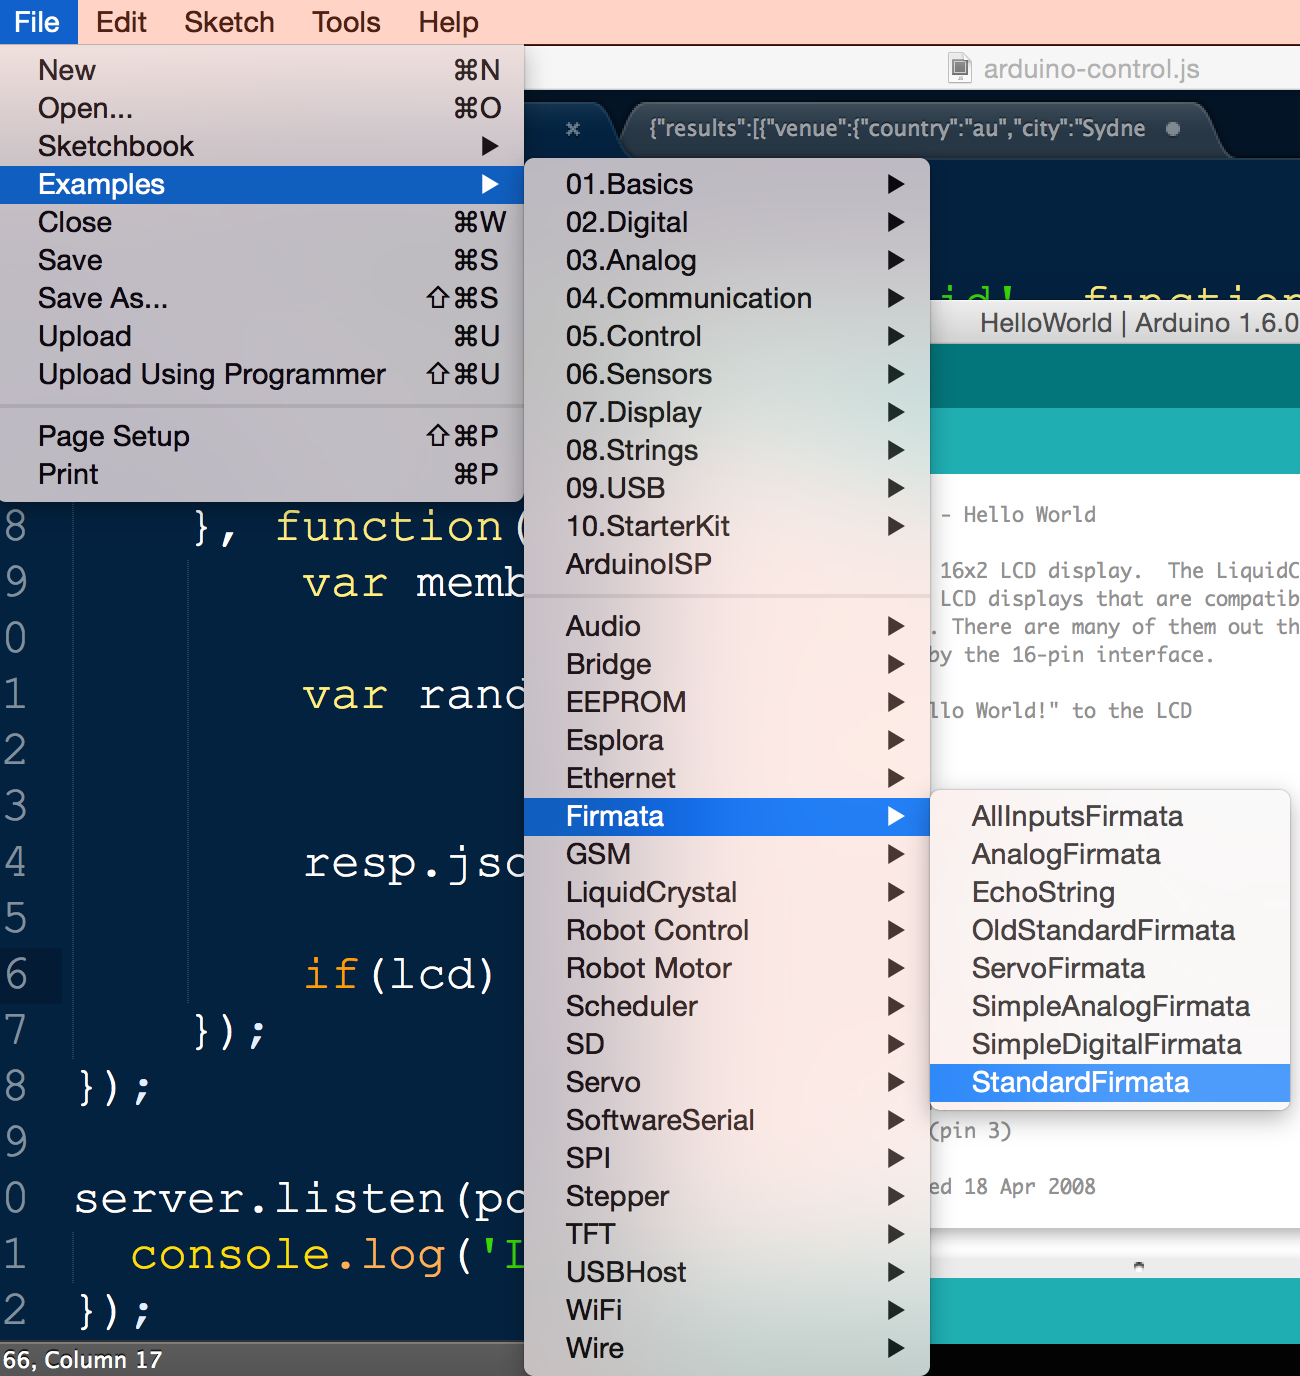
We’ve got our Node.js code ready. Now, connect up your Arduino and make sure you’ve got the StandardFirmata sketch uploaded on it:
We’ll also need to make sure we’ve got all the dependencies sorted out. My package.json file looks like so:
{
  "name": "MeetupRSVPSelector",
  "version": "1.0.0",
  "description": "Connecting the Meetup API to our Arduino LCD",
  "main": "rsvp-selector.js",
  "author": "Patrick Catanzariti",
  "dependencies": {
    "express": "^4.12.3",
    "johnny-five": "^0.8.34",
    "request": "^2.55.0",
    "underscore": "^1.8.3"
  }
}
Feel free to adapt that to your own project, the main thing you’ll want is those dependencies.
Then once you’ve got a package.json file sorted out, open up your console and go to the location of your code. Run this wonderful command:
npm installFollowed by this one:
node rsvp-selector.jsWith that running, you should now be able to go to http://localhost:5000/chooseMember/221960710 (substitute your own event ID of course) and you’ll have a random rsvp appear as a result:
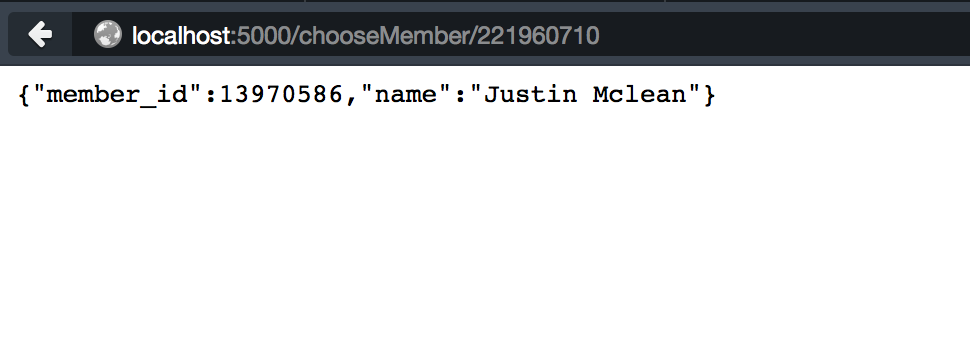
If you run it again, a new rsvp will appear. If all is going well, these names should be appearing on your Arduino’s LCD!
That Repl Thing We Mentioned
We included a bit of code that said this.repl.inject in our Node.js server earlier. What this does is allow you to run commands from within the terminal whilst your Node.js server is running to set what is being displayed on the LCD screen:
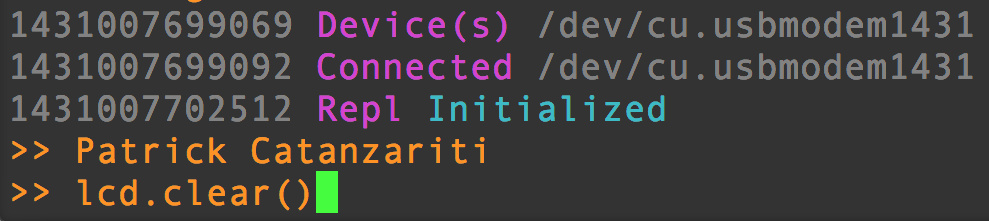
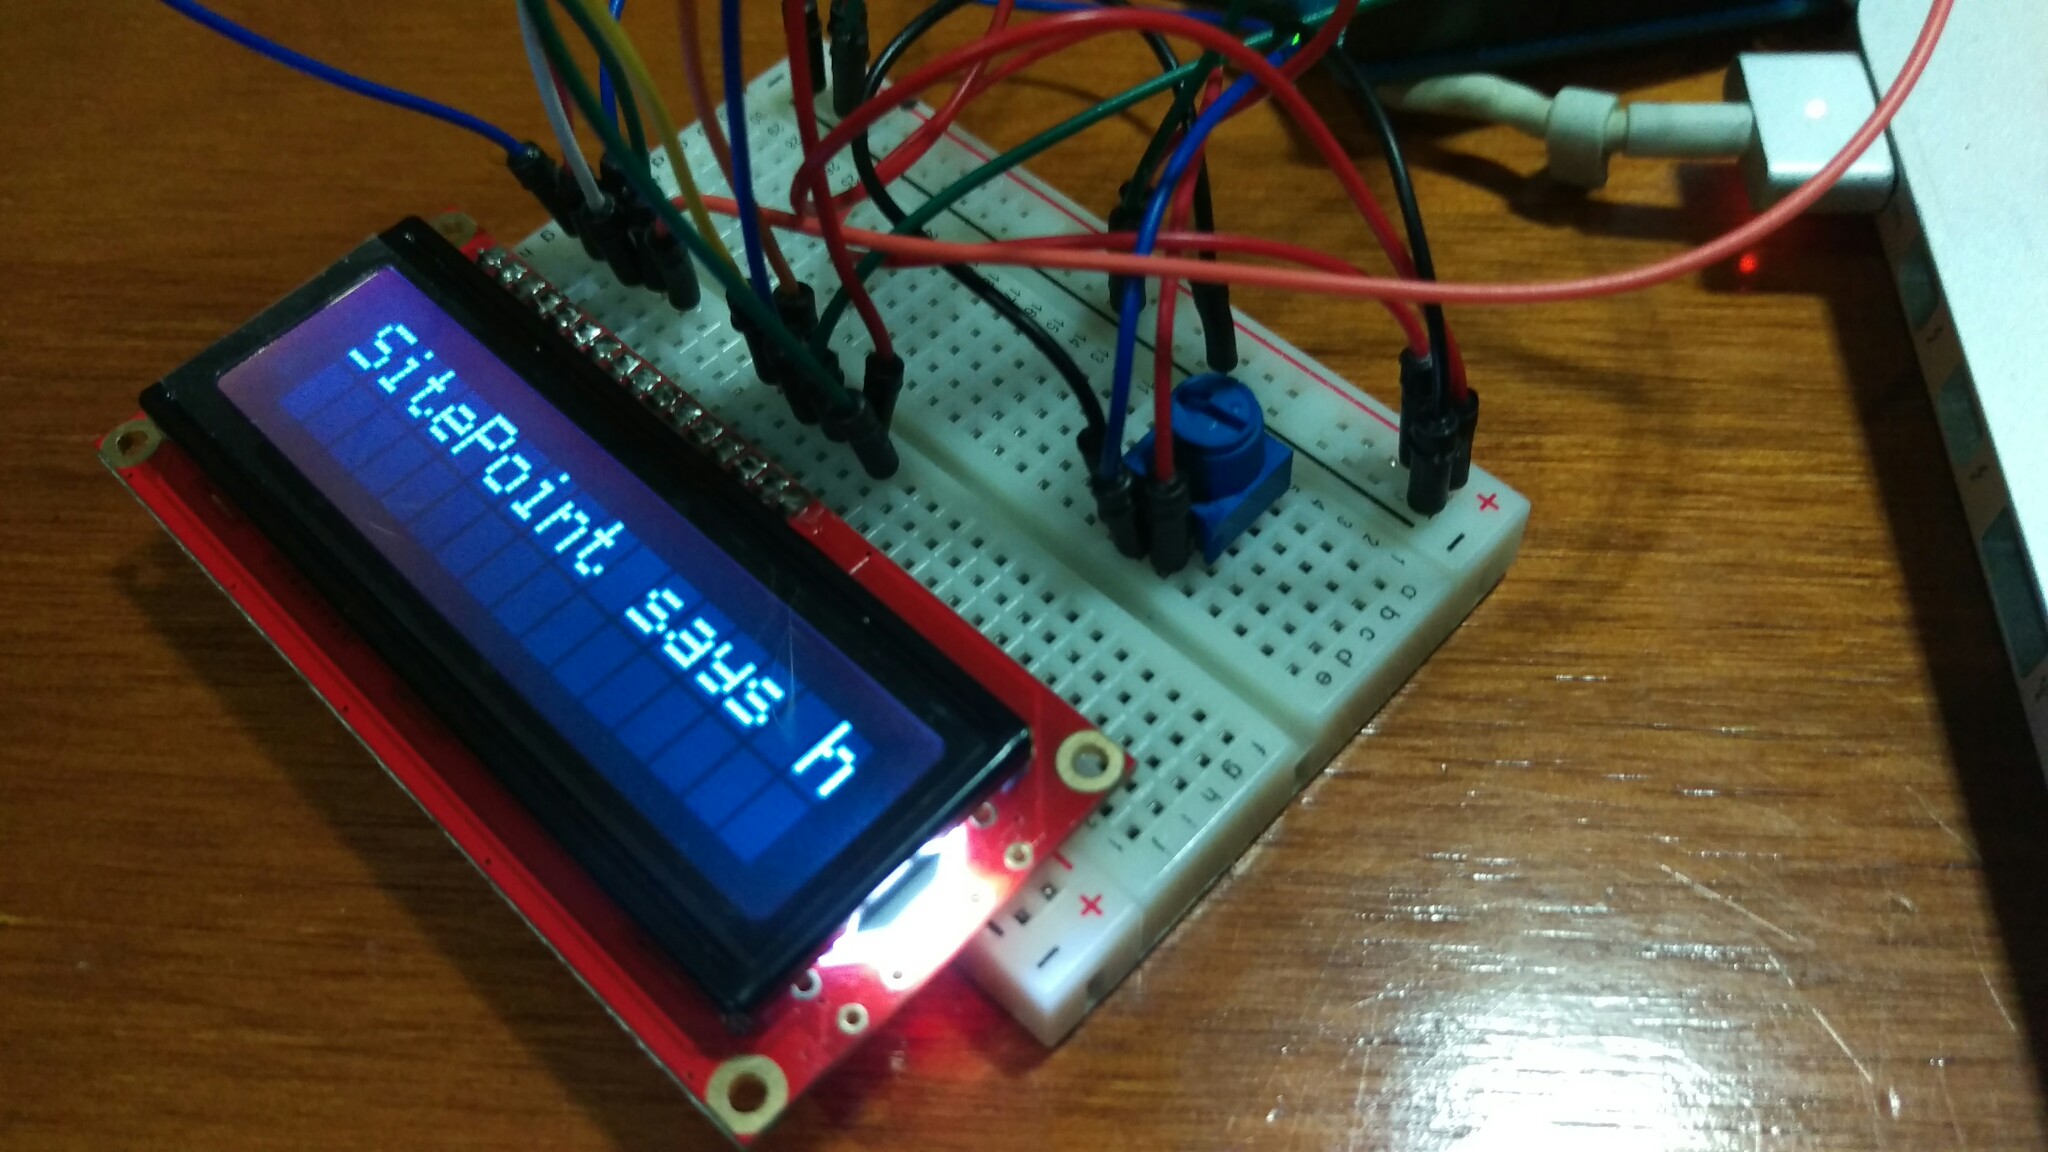
If we type in an lcd.print() we can get some magic happening:
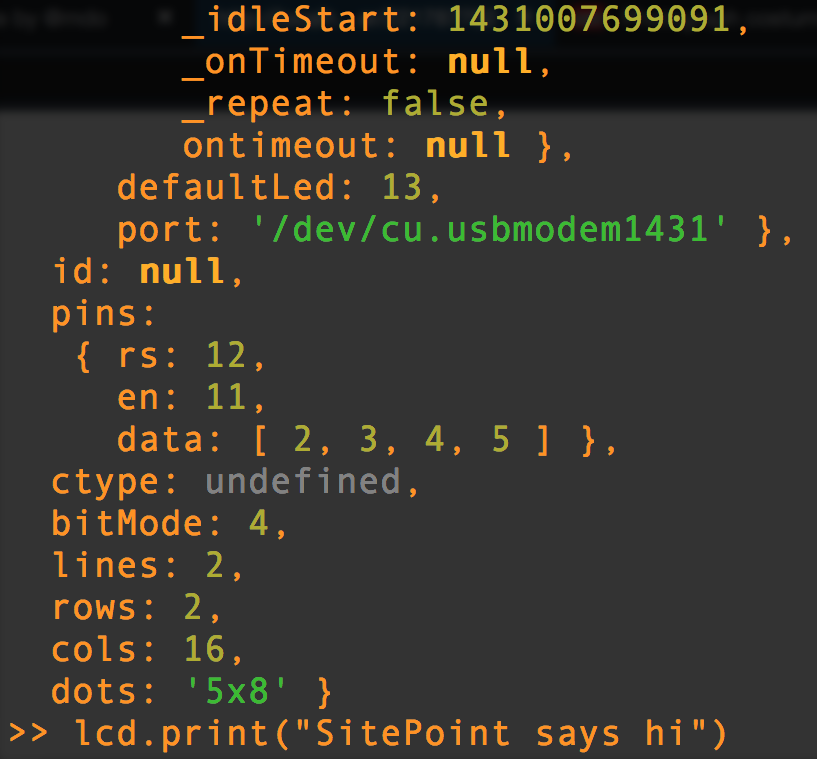
Well… our message almost fit at least!
Conclusion
We’ve successfully got a randomly selected member of the event group appearing on our LCD! This same idea could be applied to any number of other APIs out there, just adjust the request call and how you handle the data. Leave spooky messages on an LCD for housemates, keep tabs on the latest NBA playoffs scores or whatever else takes your fancy!
Make something fun based upon this code? Leave a note in the comments and share it around, I’d love to see it!
Frequently Asked Questions (FAQs) about Web APIs on Arduino LCD
How can I connect my Arduino LCD to the internet?
Connecting your Arduino LCD to the internet requires a Wi-Fi module like the ESP8266. This module allows your Arduino to connect to a Wi-Fi network and make simple data requests using HTTP. You’ll need to connect the ESP8266 to your Arduino board using the SPI interface. Once connected, you can use the ESP8266WiFi library to manage the Wi-Fi connection and the ESP8266HTTPClient library to make HTTP requests.
What is the role of an API in Arduino LCD?
An API (Application Programming Interface) is a set of rules that allows different software applications to communicate with each other. In the context of Arduino LCD, APIs are used to fetch data from the internet. This data can be anything from weather updates, stock prices, or even your own custom data. The API fetches this data and sends it to your Arduino board, which then displays it on the LCD.
How can I display data from an API on my Arduino LCD?
Displaying data from an API on your Arduino LCD involves a few steps. First, you need to connect your Arduino to the internet using a Wi-Fi module. Then, you need to make a request to the API using the HTTP protocol. The API will respond with the requested data, which you can then parse and display on your LCD. The LiquidCrystal library can be used to manage the LCD display.
Can I use any API with my Arduino LCD?
Yes, you can use any API with your Arduino LCD as long as it supports the HTTP protocol. However, keep in mind that some APIs may require authentication, which can be a bit more complex to set up. Also, the data returned by the API needs to be in a format that your Arduino can understand, typically JSON or XML.
How can I update the data on my Arduino LCD in real-time?
Updating the data on your Arduino LCD in real-time requires making regular requests to the API. You can use the delay() function to pause the execution of your program for a certain amount of time. For example, if you want to update the data every minute, you can add delay(60000) at the end of your loop() function. This will pause the program for 60000 milliseconds, or one minute, before the next iteration of the loop.
What are the limitations of using APIs with Arduino?
While using APIs with Arduino opens up a lot of possibilities, there are some limitations. First, Arduino boards have limited memory, which can be a problem when dealing with large amounts of data. Second, not all APIs are free to use, and some may have usage limits. Finally, making HTTP requests and parsing data can be complex and require a good understanding of programming and networking.
Can I use APIs with other Arduino components?
Yes, APIs can be used with any Arduino component that can connect to the internet. This includes not only LCDs but also LEDs, motors, and other sensors. The process is the same: the Arduino makes a request to the API, receives data, and uses this data to control the component.
How can I troubleshoot issues with my Arduino LCD and API?
Troubleshooting issues with your Arduino LCD and API can be challenging, but there are a few things you can do. First, check your wiring and make sure your Arduino is properly connected to the internet. Second, use the Serial Monitor to debug your code and see the responses from the API. Finally, check the API documentation for any specific requirements or limitations.
Can I use Arduino LCD and API to create my own projects?
Absolutely! Using Arduino LCD and API, you can create a wide range of projects. For example, you could create a weather station that displays real-time weather data, a stock ticker that shows the latest stock prices, or a home automation system that controls your devices based on data from the internet.
What are some good resources to learn more about using APIs with Arduino?
There are many resources available to learn more about using APIs with Arduino. The Arduino official website and forums are a great place to start. There are also many online tutorials and courses available on websites like YouTube, Udacity, and Coursera. Finally, books like “Programming Arduino: Getting Started with Sketches” by Simon Monk provide a comprehensive introduction to Arduino programming, including using APIs.
 Patrick Catanzariti
PatCat is the founder of Dev Diner, a site that explores developing for emerging tech such as virtual and augmented reality, the Internet of Things, artificial intelligence and wearables. He is a SitePoint contributing editor for emerging tech, an instructor at SitePoint Premium and O'Reilly, a Meta Pioneer and freelance developer who loves every opportunity to tinker with something new in a tech demo.