- Key Takeaways
- Part 1: Project Setup and Installation
- Part 2: Setting Up the Express Server
- Part 3: Building the Application Functionality
- Part 4: Adding Static File Serving
- Part 5: Handling POST Requests
- Part 6: Adding a Data Store
- Part 7: Adding Error Handling
- Part 8: Serving HTML Pages
- Conclusion
- Frequently Asked Questions (FAQs)
Node.js is an open-source, cross-platform JavaScript runtime environment allowing developers to build server-side applications outside a browser. It can be used to build mission-critical production applications that perform extremely well. In this practical guide, we’ll look at how you can create your web server with Node.js.
Key Takeaways
- Implementing a simple web server with Node.js. This guide shows how to set up and deploy a web server using Node.js. It walks through each step, including project initialization, Express.js integration, and many essential features, providing a solid foundation for anyone new to Node.js.
- Building dynamic web applications. This guide covers a wide array of functionalities, such as handling forms, responding to user requests, and dynamically serving web pages, which are essential to making your web applications interactive and engaging.
- Exploring Node.js features. Dive deeper into Node.js’s offerings for web development, including how to work with static files, handle errors, and implement form submissions. This guide provides a practical approach to using Node.js to build feature-rich web applications.
Part 1: Project Setup and Installation
Step 1: Install Node.js and npm
To start building our web application, ensure you have Node.js and npm installed on your system. Node.js provides a JavaScript runtime environment, while npm is the package manager for Node.js. You can download and install Node.js from the official website.
To ensure that Node.js and npm are correctly installed, open your terminal and run the following commands:
node -v
npm -v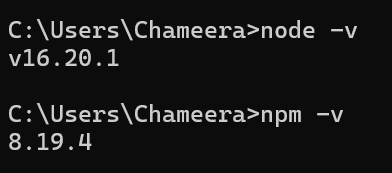
Step 2: Initialize a new Node.js Project
Create a new directory for your project and initialize a new Node.js project by running the following command in your terminal:
mkdir book-club
cd book-club
npm init -y
This command will create a package.json file for your project. It will contain metadata about the project, including its dependencies:
{
  "name": "book-club",
  "version": "1.0.0",
  "description": "",
  "main": "index.js",
  "scripts": { "test":
  "echo \"Error: no test specified\" && exit 1" },
  "keywords": [],
  "author": "",
  "license": "ISC" }
Step 3: Install Express.js
Express.js is a popular web framework for Node.js, with features for building web and mobile applications. The command below installs Express.js and adds it as a dependency in your package.json file:
npm install expressPart 2: Setting Up the Express Server
Step 1: Create a new file for the server
Now that the project is set up, create a new file named app.js in the project directory. This file will contain the code for the Express server.
Step 2: Import Express.js
At the top of your app.js file, import the Express.js module:
const express = require('express');Step 3: Create an Express application
Next, create an instance of an Express application:
const app = express();The express() function is a top-level function exported by the Express module. It creates an Express application, which we assign to the app variable.
Step 4: Define a route
Define a route for the path / with a simple message when accessed:
app.get('/', (req, res) => {
 res.send('Hello World!');
});
Here, app.get() is a function that tells the server what to do when a GET request is made to a particular path, in this case, /. This function takes two arguments: the path and a callback function that takes a request and a response.
Step 5: Start the server
Finally, let’s start the server on port 3000:
const port = 3000;
app.listen(port, () => {
 console.log(`Server is running at http://localhost:${port}`);
});
The app.listen() function starts the server and makes it listen for requests on the specified port.
Part 3: Building the Application Functionality
Now that we have the Express server set up, let’s start building the application’s functionality by creating a few different routes.
Step 1: Create a new file for messages
In your project directory, create a new file named messages.js. This file will contain the messages that your server will send as responses:
module.exports = {
 home: 'Welcome to our Book Club!',
 about: 'About Us',
 notFound: '404 Not Found'
};
Step 2: Import messages into your server file
At the top of your app.js file, import the messages:
const messages = require('./messages');Step 3: Use messages in your routes
Now, use these messages in the routes:
app.get('/', (req, res) => {
 res.send(messages.home);
});
app.get('/about', (req, res) => {
 res.send(messages.about);
});
app.use((req, res) => {
 res.status(404).send(messages.notFound);
});
Here, app.use() is a method that is called for every request made to the server. We’re using it here to handle all routes that aren’t defined and send a 404 Not Found message.
Part 4: Adding Static File Serving
Step 1: Create a new directory for static files
Create a new directory named public. This directory will contain all your static files:
mkdir publicStep 2: Add some static files
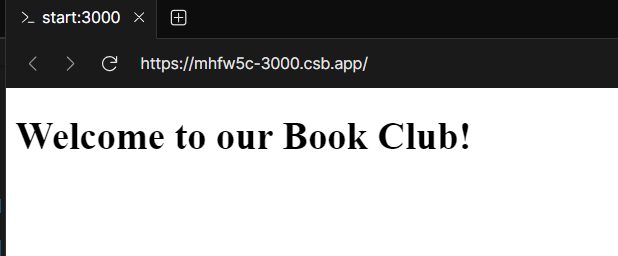
For the purpose of this guide, let’s add a simple HTML file and a CSS file. In your public directory, create a new file named index.html and add the following code:
<!DOCTYPE html>
<html>
<head>
  <title>Book Club</title>
  <link rel="stylesheet" type="text/css" href="/styles.css">
</head>
<body>
  <h1>Welcome to our Book Club!>/h1>
</body>
</html>
Also, create a new file named styles.css in the public directory and add the following code:
body {
  font-family: Arial, sans-serif;
}
Step 3: Use express.static to serve static files
Add the line below to the app.js file, before the route definitions:
app.use(express.static('public'));The express.static function is a built-in middleware function in Express.js. It serves static files and takes the directory name from which you want to serve files as an argument.
Part 5: Handling POST Requests
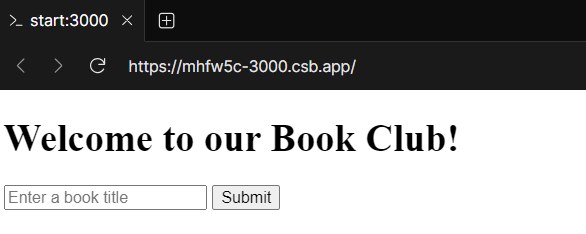
Step 1: Add a form to index.html
In your index.html file, add a form with a single input field and a submit button:
<form action="/submit" method="post">
  <input type="text" name="book" placeholder="Enter a book title">
  <button type="submit">Submit</button>
</form>
This form will send a POST request to the /submit path. The request body will include the input field’s value.
Step 2: Install body-parser
You need to install a middleware called body-parser to handle the data sent in the POST request:
npm install body-parserStep 3: Import and use body-parser
Import body-parser into the app.js file:
const bodyParser = require('body-parser');
app.use(bodyParser.urlencoded({ extended: false }));
The bodyParser.urlencoded() function parses incoming request bodies available under the req.body property.
Step 4: Handle POST requests
Now, create a new endpoint to handle this POST request in the app.js file:
app.post('/submit', (req, res) => {
  const book = req.body.book;
  console.log(`Book submitted: ${book}`);
  res.send(`Book submitted: ${book}`);
});
Part 6: Adding a Data Store
In this part, we’ll add a simple data store to our application to store the books that users submit. We’ll use an array to store the data for simplicity.
Step 1: Create a data store
At the top of your app.js file, create an array to store the books:
const books = [];Step 2: Update POST request handler
Update the handler for POST requests to add the submitted book to the books array:
app.post('/submit', (req, res) => {
    const book = req.body.book;
    books.push(book);
    console.log(`Book submitted: ${book}`);
    res.send(`Book submitted: ${book}`);
});
Step 3: Create a route to view all books
Create a new route handler that returns all the submitted books:
app.get('/books', (req, res) => {
  res.send(books.join(', '));
});
Note: in a real-world application, you would likely store your data in a database. Here, the data in the array will be lost every time you restart your server.
Part 7: Adding Error Handling
In this part, we’ll create an error handler. Express.js provides a built-in error handler. But you can also create your own error handling middleware.
Step 1: Create an error handling middleware
In your app.js file, add the following code at the end of the file:
app.use((err, req, res, next) => {
  console.error(err.stack);
  res.status(500).send('Something Went Wrong!');
});
This middleware function has four arguments instead of the usual three (req, res, next). This function is called whenever there’s an error in your application.
Step 2: Use the next function to pass errors
If you pass an argument to the next() function, Express.js will assume it’s an error, skip all subsequent middleware functions, and go straight to the error handling middleware function:
app.post('/submit', (req, res, next) => {
  const book = req.body.book;
  if (!book) {
    const err = new Error('Book title is required');
    return next(err);
  }
  books.push(book);
  console.log(`Book submitted: ${book}`);
  res.send(`Book submitted: ${book}`);
});
This handler checks if a book title was provided in the POST request. If not, it creates a new Error object and passes it to the next function. This will skip all subsequent middleware functions and go straight to the error handling middleware.
Part 8: Serving HTML Pages
In this part, we’ll modify our application to serve HTML pages instead of plain text. This will allow you to create more complex user interfaces.
Step 1: Install EJS
EJS (Embedded JavaScript) is a simple templating language that allows you to generate HTML markup using plain JavaScript:
npm install ejsStep 2: Set EJS as the view engine
In your app.js file, set EJS as the view engine for your Express application:
app.set('view engine', 'ejs');This tells Express to use EJS as the view engine when rendering views.
Step 3: Create a views directory
By default, Express will look in a directory named views for your views. Create this directory in your project directory:
mkdir viewsStep 4: Create an EJS view
In your views directory, create a new file named index.ejs and add the following code:
<!DOCTYPE html>
<html>
<head>
    <title>Book Club</title>
</head>
<body>
    <h1><%= message %></h1>
    <form action="/submit" method="post">
        <input type="text" name="book" placeholder="Enter a book title">
        <button type="submit">Submit</button>
    </form>
    <h2>Submitted Books:</h2>
    <ul>
        <% books.forEach(function(book) { %>
            <li><%= book %></li>
        <% }); %>
    </ul>
</body>
</html>
The <%= message %> placeholder is used to output the value of the message variable.
Step 5: Update POST request handler
Update the POST /submit route handler to add the submitted book to the books array and redirect the user back to the home page:
app.post('/submit', (req, res) => {
  const book = req.body.book;
  books.push(book);
  console.log(`Book submitted: ${book}`);
  res.redirect('/');
});
Note: It’s a good practice to redirect the user after a POST request. This is known as the Post/Redirect/Get pattern, and it prevents duplicate form submissions.
Step 6: Update the home route
Update the GET / route handler to pass the books array to the index.ejs:
app.get('/', (req, res) => {
   res.render('index', { message: messages.home, books: books });
});
Step 7: Update the home route
Now it’s time to run the application and see it in action.
You can start the server by running the following command in your terminal:
node app.jsYou should see a message saying Server is running at http://localhost:3000 in the terminal.

Alternatively, you can simplify the start process by adding a script to the package.json file:
Now, instead of running node app.js , you can call npm start:
npm start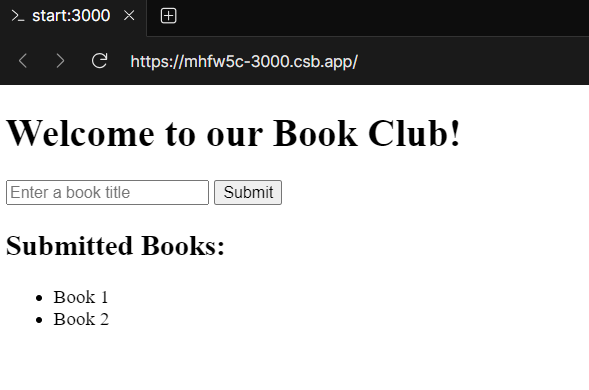
Conclusion
Congratulations! You’ve built a web application with Node.js and Express.js. This application serves static files, handles different routes, uses middleware, and more.
If you’d like to try this out for yourself, or would like to explore the code, checkout this CodeSandbox demo.
There’s so much more you can do with Node.js and Express.js. You can add more routes, connect to different databases, build APIs, create real-time applications with WebSockets, and much more. The possibilities are endless.
I hope this guide has been helpful. Happy coding!
Frequently Asked Questions (FAQs)
How can I handle routing in a Node.js web server?
You can use the http module handle routes manually by checking the request object URL. However, as applications become more complex, it is recommended to use a framework like Express.js. It helps you define routes based on HTTP methods and URLs in a modular and clean way.
How can I implement real-time communication in a Node.js web server?
Real-time communication in a Node.js web server can be implemented using WebSockets. The socket.io library is popular for adding WebSocket support to a Node.js server. It enables real-time, bidirectional, event-based communication between clients and the server.
What is the best way to manage database operations in Node.js web servers?
The best way to manage database operations in Node.js is to use ORM (Object-Relational Mapping) or ODM (Object Document Mapping) tools. They provide high-level abstraction for database interactions and simplifies connection pooling, query building, and schema validation.
For SQL databases: Sequelize, TypeORM
For NoSQL databases: Mongoose, Couchbase
How can I handle errors globally in an Express.js application?
Global error handling in an Express.js application can be implemented by defining a special middleware function with four arguments: (err, req, res, next). This middleware should be added after all app.use() and route calls. Inside this function, you can log the error, set the response status code, and send back an error message.
How can you ensure that a Node.js web server is scalable?
There are several ways to ensure the scalability of a Node.js web server:
Using the cluster module to take advantage of multi-core systems.
Optimizing code and database queries.
Implementing caching strategies.
Using load balancers to distribute traffic across multiple app instances.
Additionally, designing the stateless application allows horizontal scaling by adding more instances as needed.
 Chameera Dulanga
Software engineer with more than 3 years of working experience in React, Angular, Node.js, Serverless, and AWS. Recognized as an AWS Community Builder for 2022 & 2023. Tech Blogger since 2019 with 150+ articles.