
In our effort to bring the benefits of pre-packaged software to enterprise workloads in the cloud, Bitnami has recently started shipping a new generation of apps and infrastructure stacks in the Azure Marketplace that are designed for production use. One such stack is our brand-new Node.js High Availability (HA) Cluster, which you can deploy on Azure with absolutely zero software charges ever (besides what Azure charges for compute).
When you launch the Node.js High Availability Cluster ARM template through the Marketplace, you get a cluster of Node.js servers with a shared file-system and load balancer instead of everything running in the same machine. This hooks into a database of your choice – in the walkthrough that follows we will use the MongoDB flavor of the globally distributed, highly-available database service Azure Cosmos DB. As you’ll see, what was once a painful and error-prone process has been reduced to deploying it all in a few clicks.
Deploy an example app to a production environment in minutes
Before we get started, let’s take a look at the topology of our system.
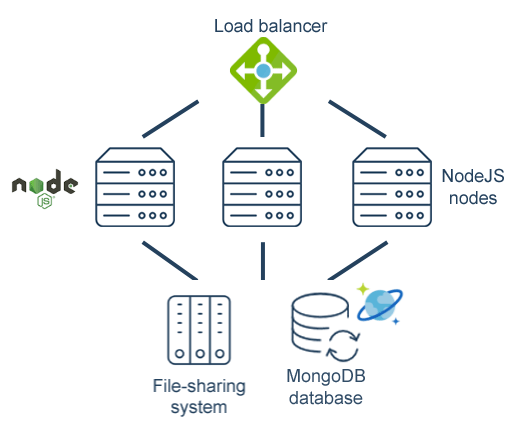 For this walkthrough, we’ll use a simple To-do list application based on the MEAN (MongoDB, Express, Angular, Node.js) stack. The sample application is available on GitHub.
Assumptions and prerequisites
This guide makes the following assumptions:
- You have a Microsoft Azure account. If you don’t, create one.
- You have a Node.js application that is compatible with Bitnami’s Node.js High-Availability Cluster. In case it isn’t, or if you don’t have a custom Node.js application, you can use our sample application.
Step 1: Deploy a Cosmos DB instance
The example Node.js application used in this guide needs a MongoDB database. Since MongoDB is not included with Bitnami’s Node.js High-Availability Cluster, you must deploy this separately. The best way to do this is with the Azure Cosmos DB service, which provides a scalable, high-availability database in the cloud.
As a first step, go ahead and launch a new Azure Cosmos DB instance, as follows:
- Browse to the Azure Portal and log in if needed.
- From the menu bar on the left, select the “Azure Cosmos DB” item.
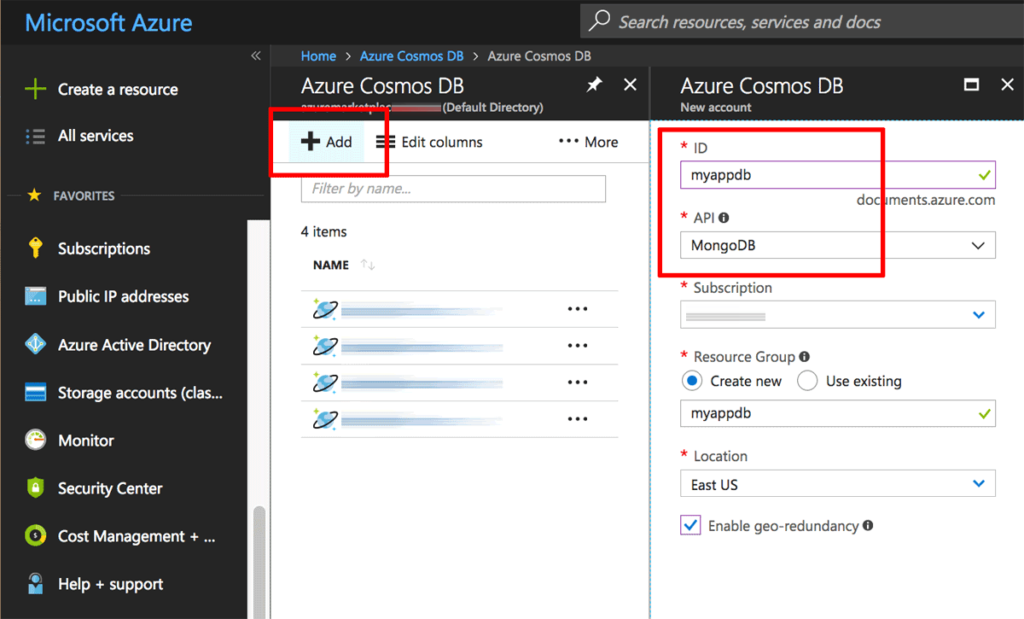
- Click “Add” to add a new Cosmos DB instance.
- Enter a unique name for your new database instance in the “ID” field and select “MongoDB” as the API.
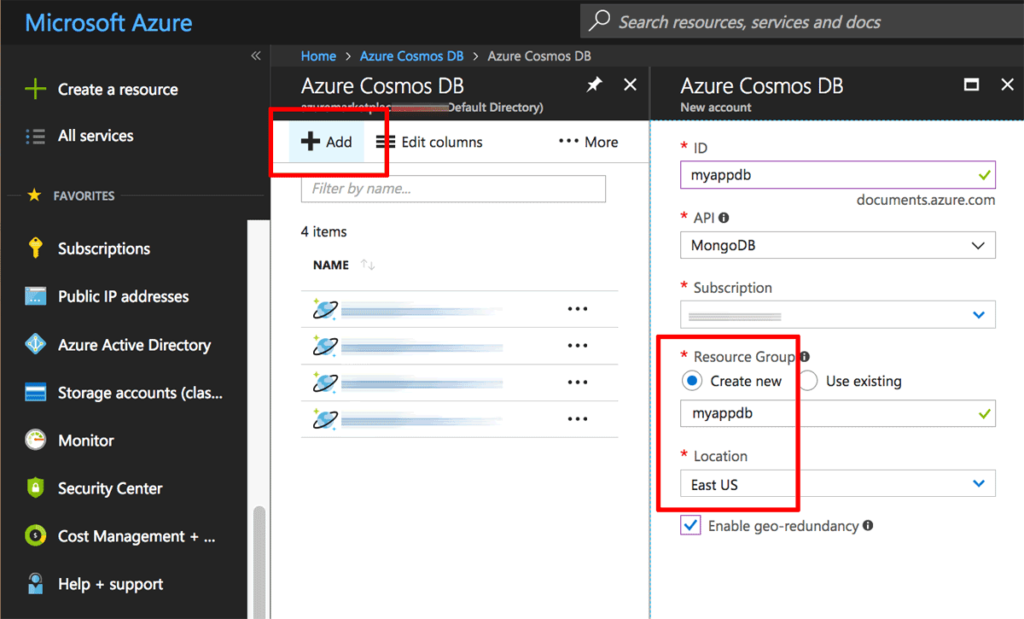
 In the same tab, create a new resource group by entering a name for it, and choose the location for the server to be deployed. Click “Create” once done.
 Your new Azure Cosmos DB instance will be deployed and will appear in the list of instances once online.
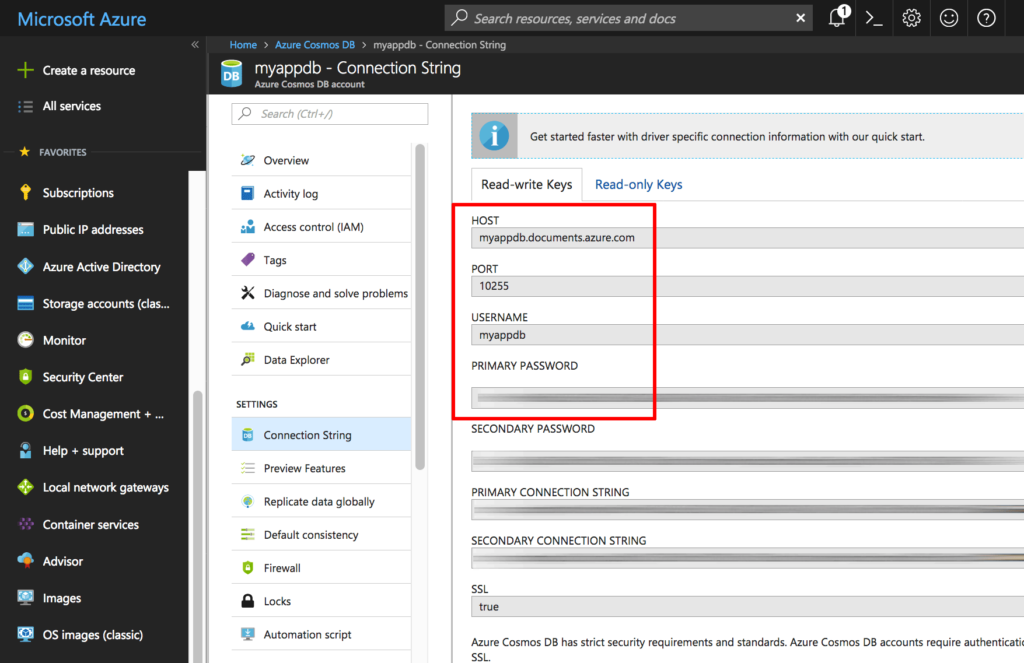
Once the instance is online, select the newly-created instance and then select the “Settings -> Connection String” menu item. In the “Read-write Keys” tab, note the database host name, port, username and primary password, as you will need these when deploying your Node.js application to the cluster.
Step 2: Deploy a Node.js application
The next step is to launch the Bitnami Node.js High-Availability Cluster solution with a Node.js application. The Azure Marketplace lets you do this in just a couple of clicks. Follow these steps:
- Browse to the Azure Marketplace.
- Search for the solution by entering the search term “Bitnami high availability nodejs” in the search bar at the top.
- Select the Bitnami Multi-Tier Solution for Node.js High-Availability Cluster in the list of search results.
- On the description page, review the information and fees. Click the “Get it now” button to proceed and confirm.
- You will now be redirected to the Azure Portal. Log in if required.
- On the solution description page, review the available information and click the “Create” button to proceed.

- In the “Basics” tab, enter an easy-to-remember name for the deployment together. By default, the solution is configured with the URL to Bitnami’s sample MEAN application, but you can edit this to reflect the Git repository URL for your own application.
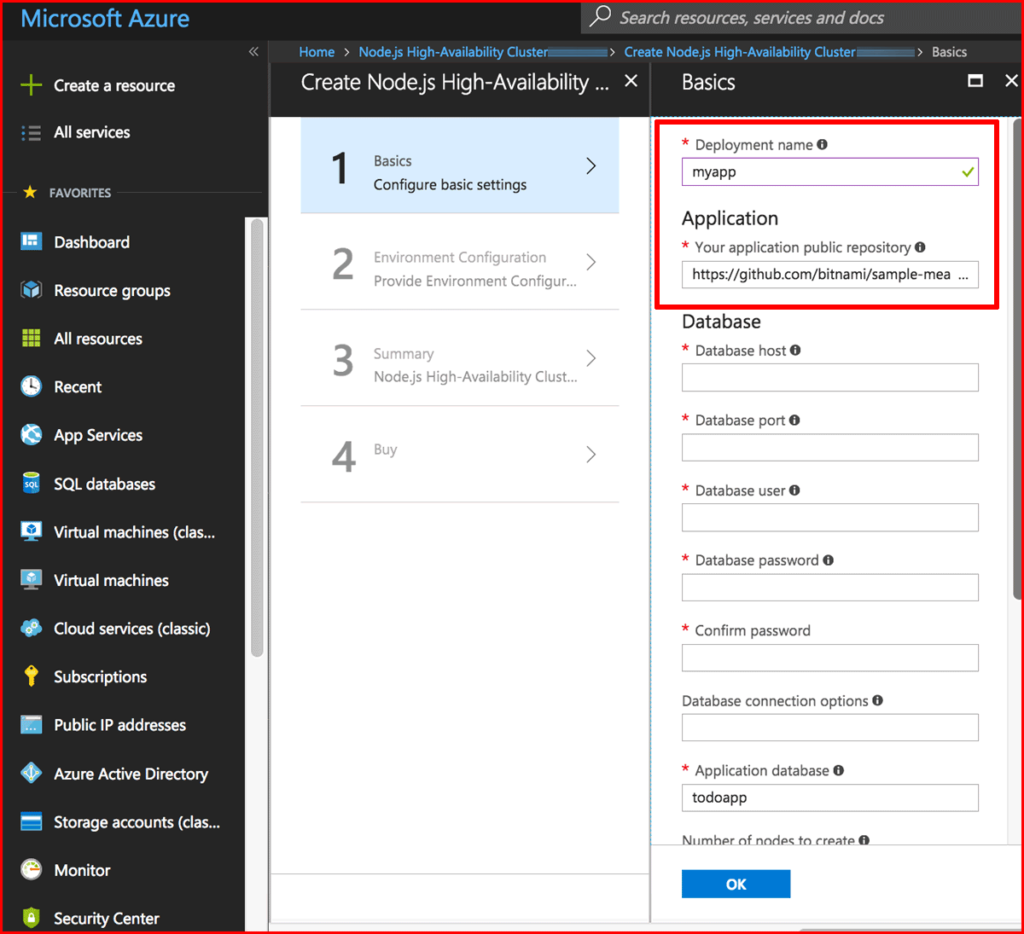 NOTE: Ensure that your application complies with these requirements before proceeding. You can use a private repository by including the username and password in the repository URL, in the format https://USERNAME:PASSWORD@URL.
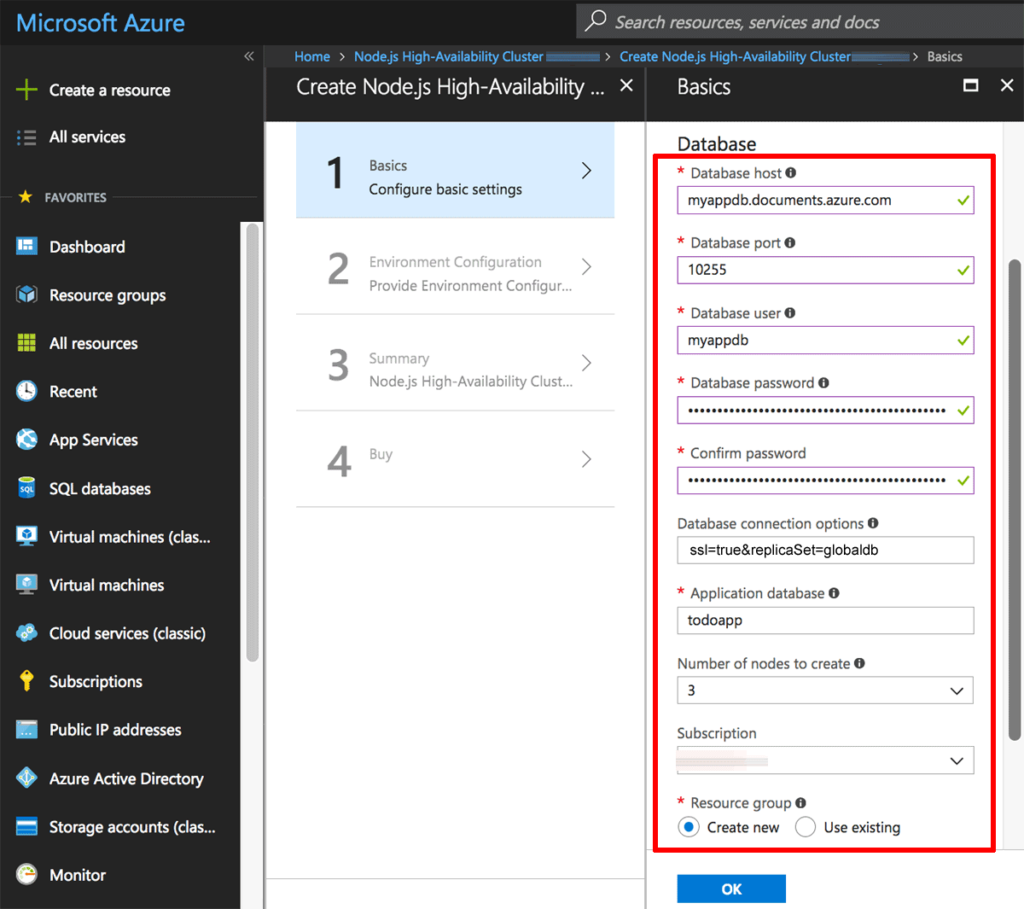
- In the same tab, enter the host name, port, username and password for your Cosmos DB instance, a name for the application database and the number of nodes for the cluster. Enter the string ssl=true&replicaSet=globaldb in the “Database connection options” field and create a new resource group by entering a name for it and choosing its location. Click “OK” when done.
- In the “Environment Configuration” tab, enter a password or an SSH public key and choose the size of the virtual machines in the deployment. For more information on available sizes and configurations, refer to the Azure documentation.
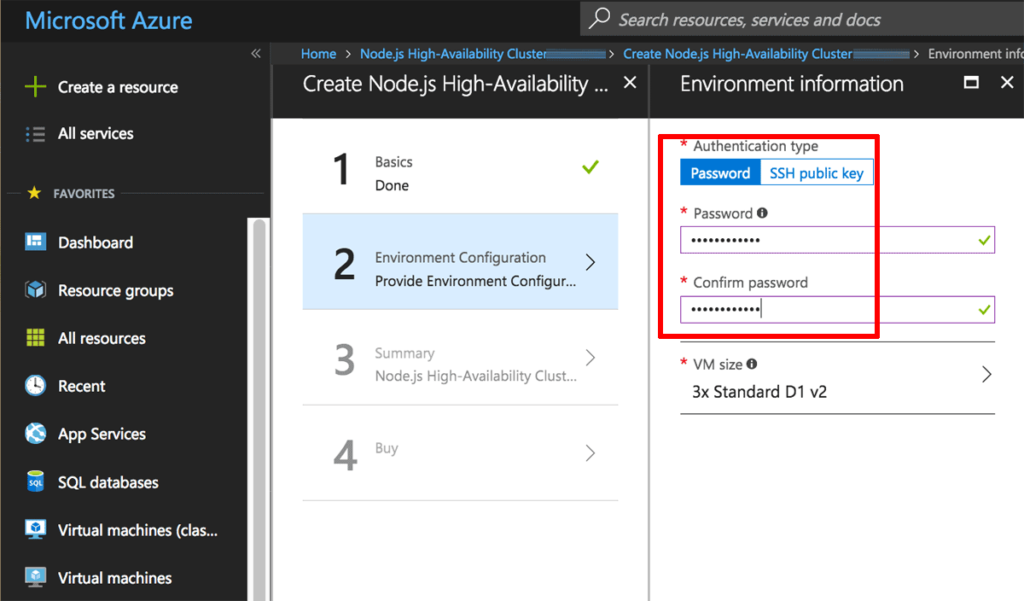 NOTE: To generate a new SSH key pair, you can use PuTTYgen (Windows) or the ssh-keygen command (Linux, macOS, and Bash on Windows 10). Find instructions on using PuTTYgen and instructions on using ssh-keygen.
- In the “Summary” tab, verify the chosen settings. Click “OK” to proceed.
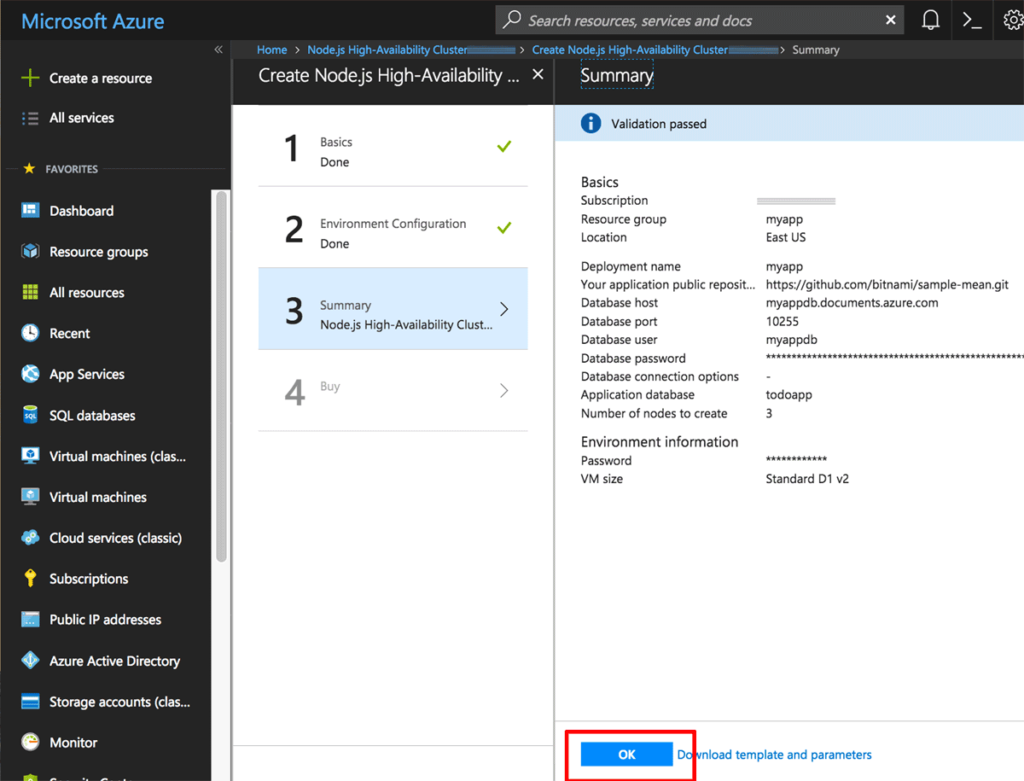
- In the “Create” tab, review the terms of use and click “Create” to proceed.
Azure will now begin spinning up the new cluster. A notification will appear indicating the current status.
 The process can take up to 40 minutes as the various nodes in the cluster are created and the load balancer is initialized. Once all the necessary elements of the solution been provisioned, you will see a notification and the new instances and related resources will appear in the “Resource groups” section of the Azure Portal.
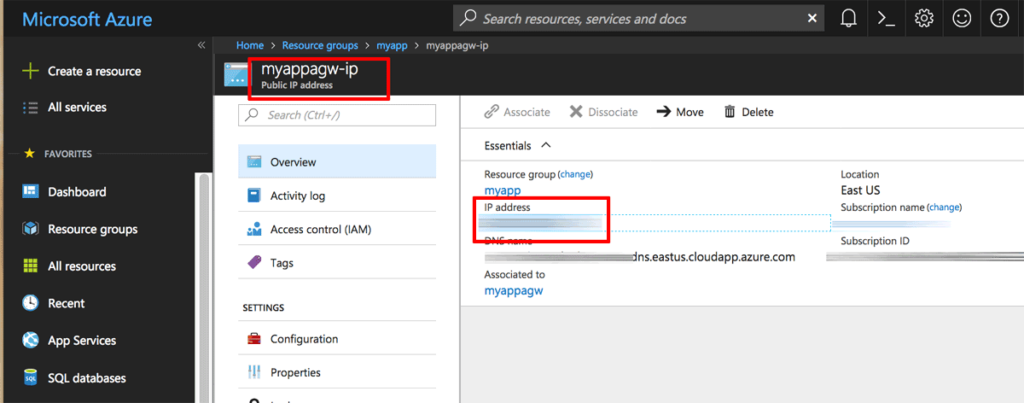
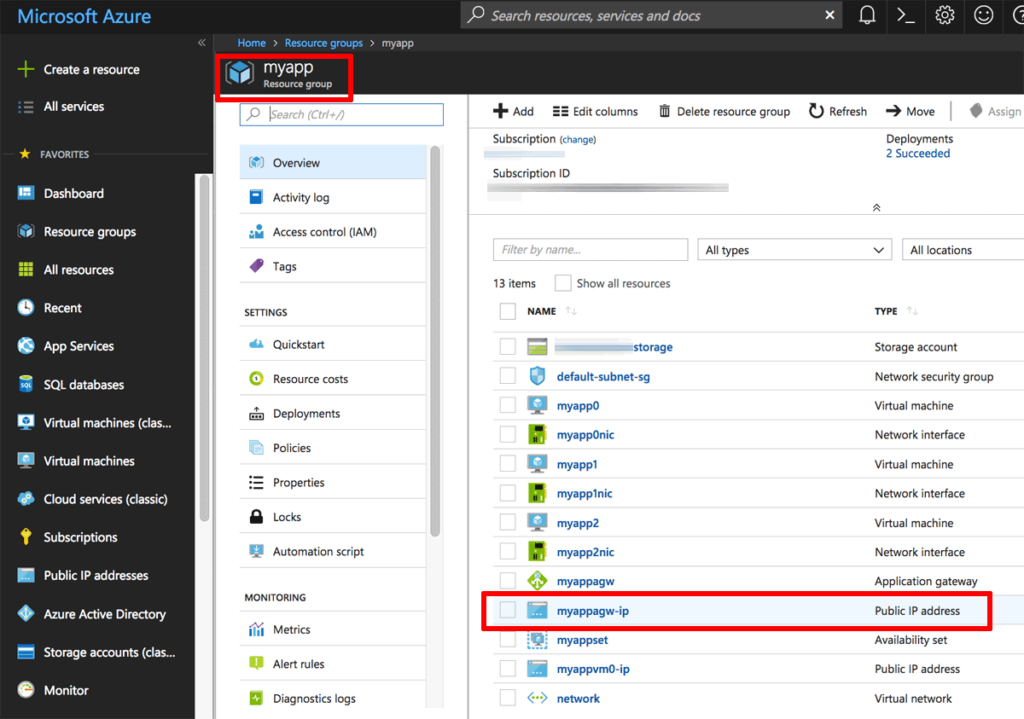 You will see that the resource group includes multiple virtual machines (the nodes of the cluster) as well as a load balancer. Selecting the load balancer will display its properties, including its public IP address.
Step 3: Test the deployed application
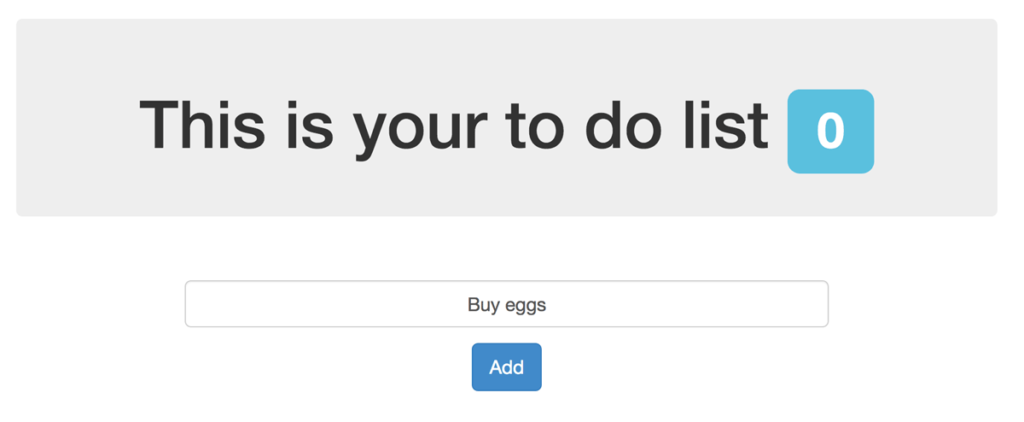
Enter the load balancer’s IP address directly into your browser’s address bar. You should now see your application. The image below shows the sample application’s welcome page:
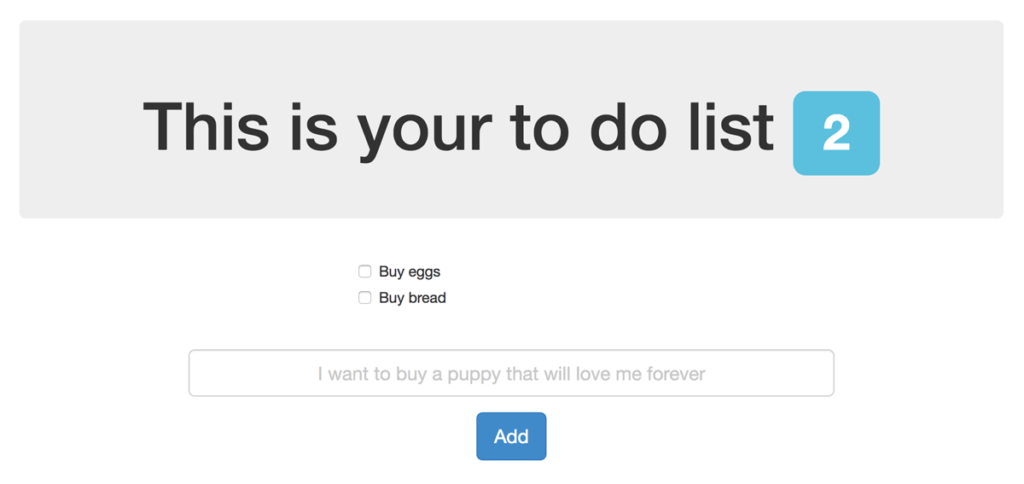
 Verify that the application is able to read and write data using the MongoDB database configured earlier. With the example application, enter a new to-do item and it should appear in the list, as shown below:
 Congrats, your Node.js application is now deployed, configured for use with Cosmos DB, and available for use in high-availability scenarios!
For more information, including details about how to configure SSL and connect to the individual nodes of the cluster using SSH, refer to the documentation for Bitnami’s Node.js High-Availability Cluster.
Let us know in the comments if you completed the walkthrough and have any feedback!
Want to see a video version? We did the walkthrough (below) live on Azure Friday.